
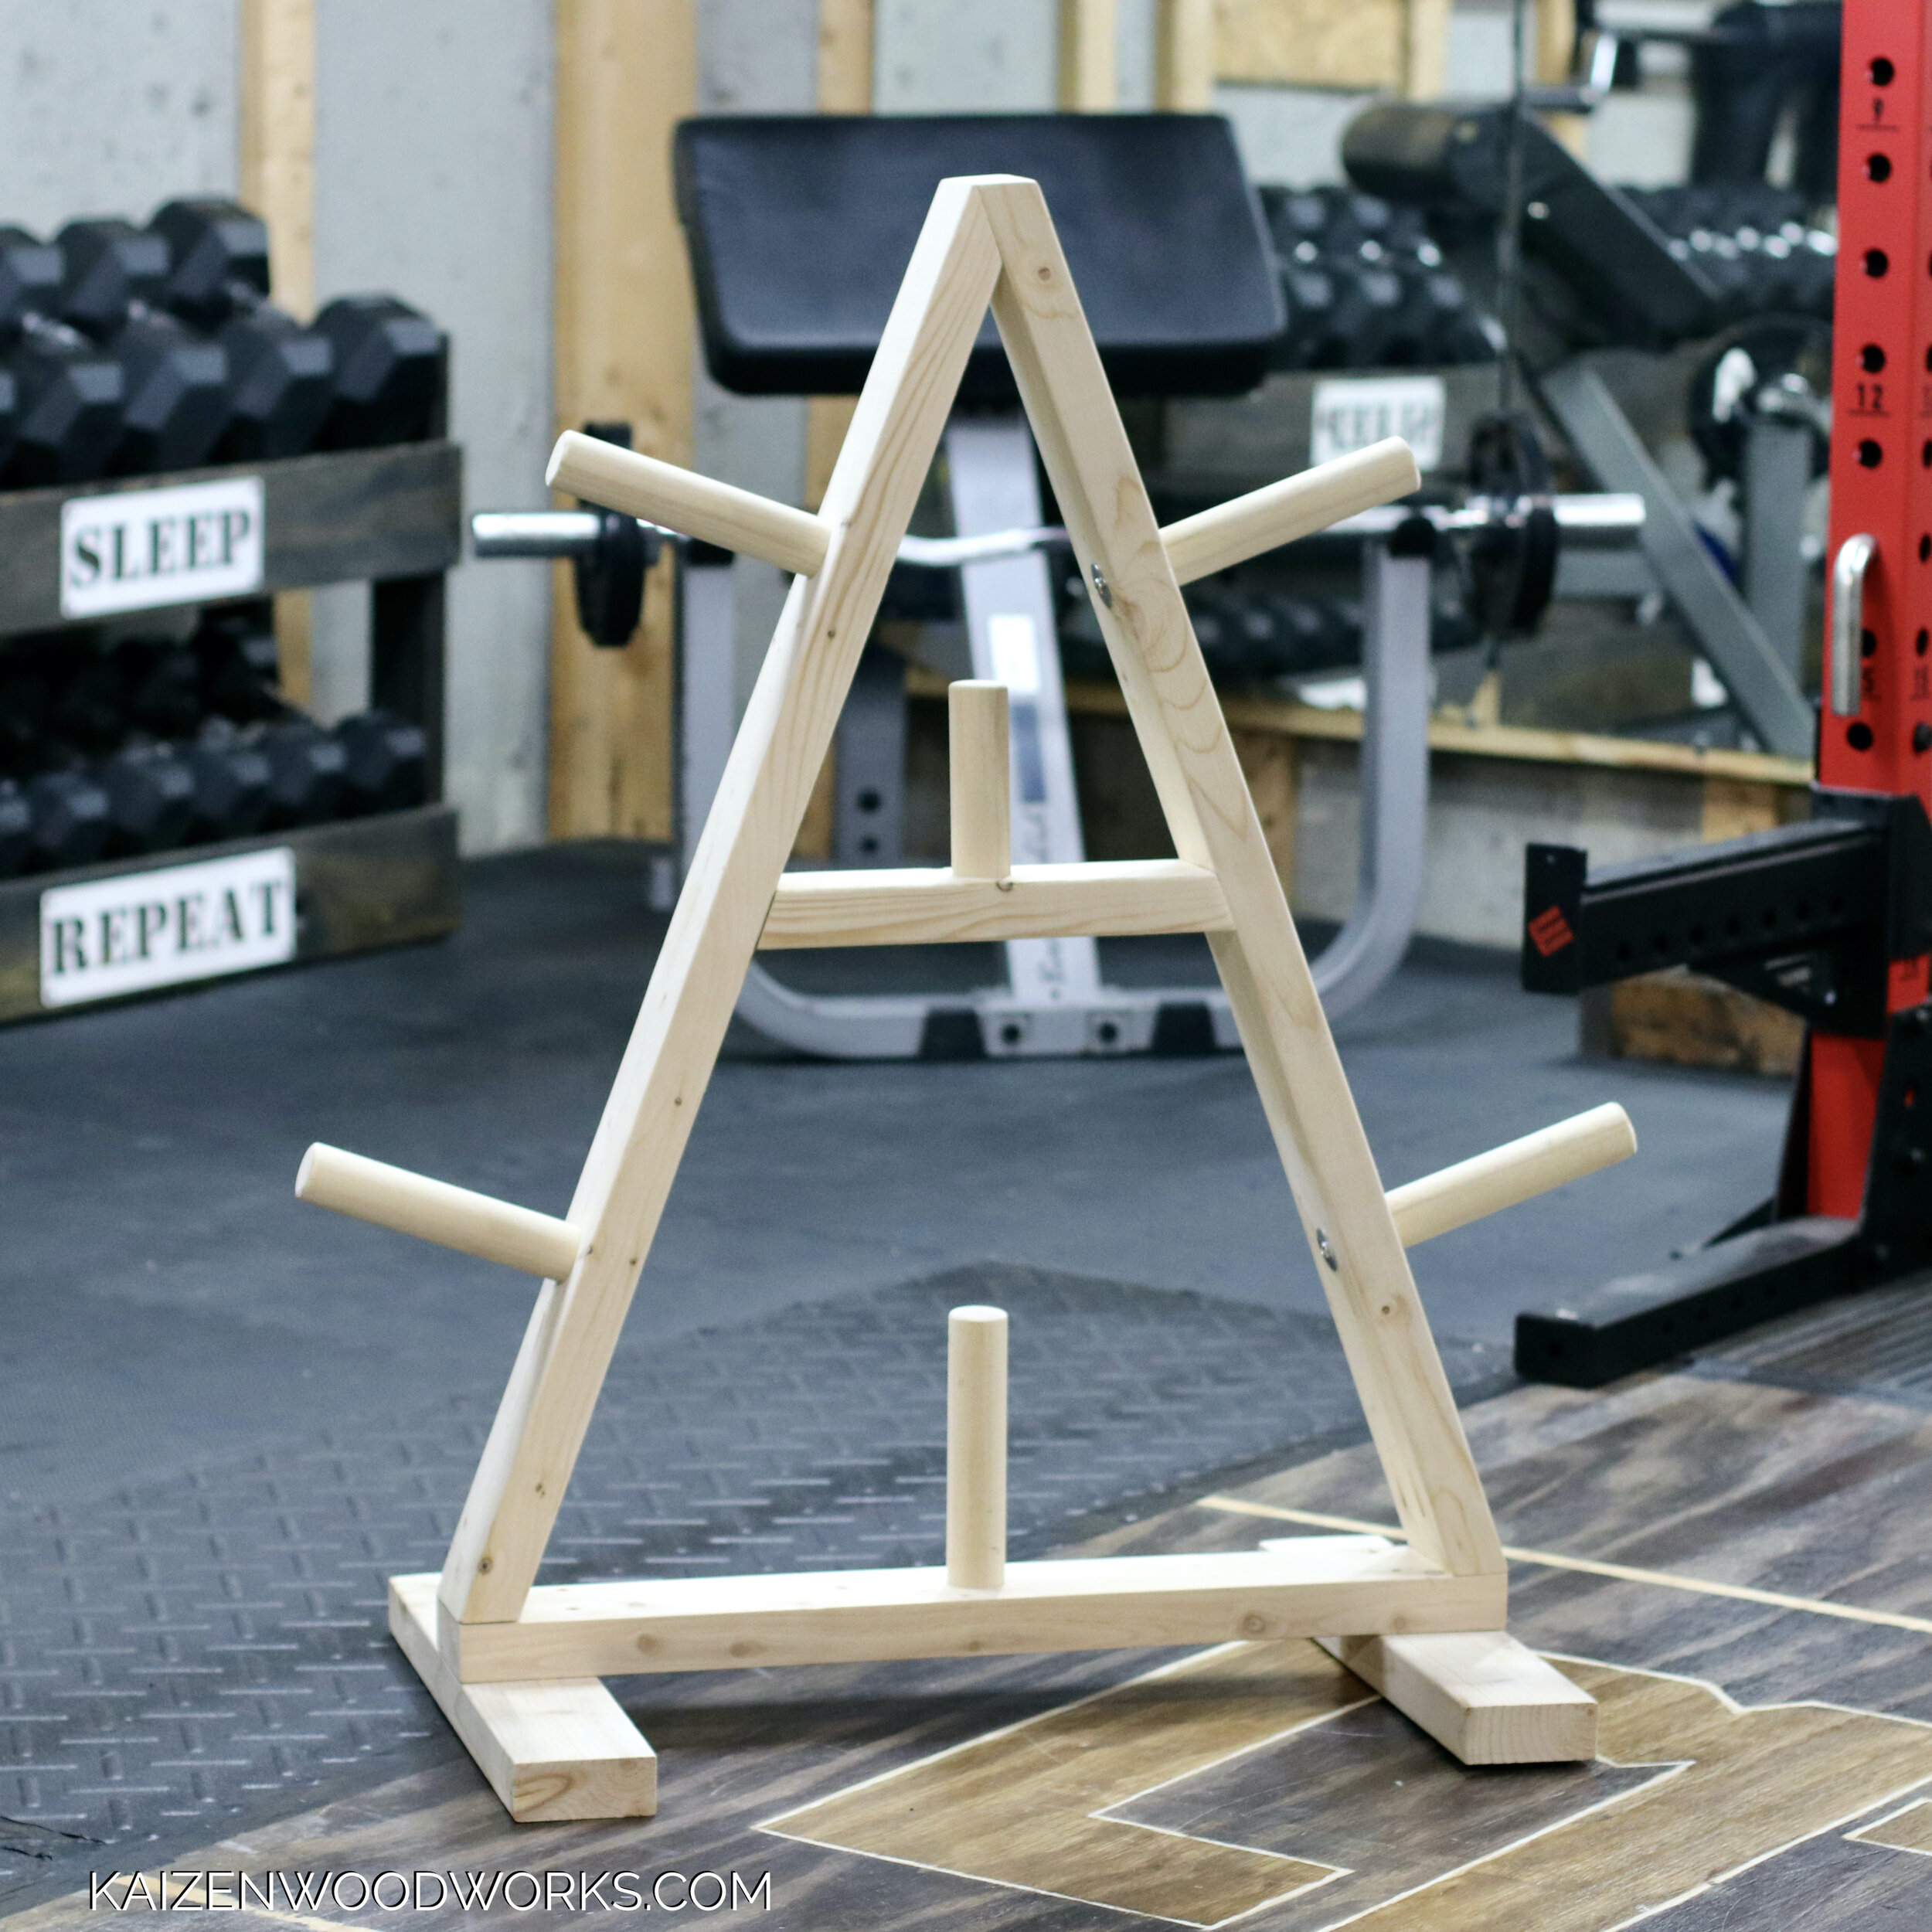
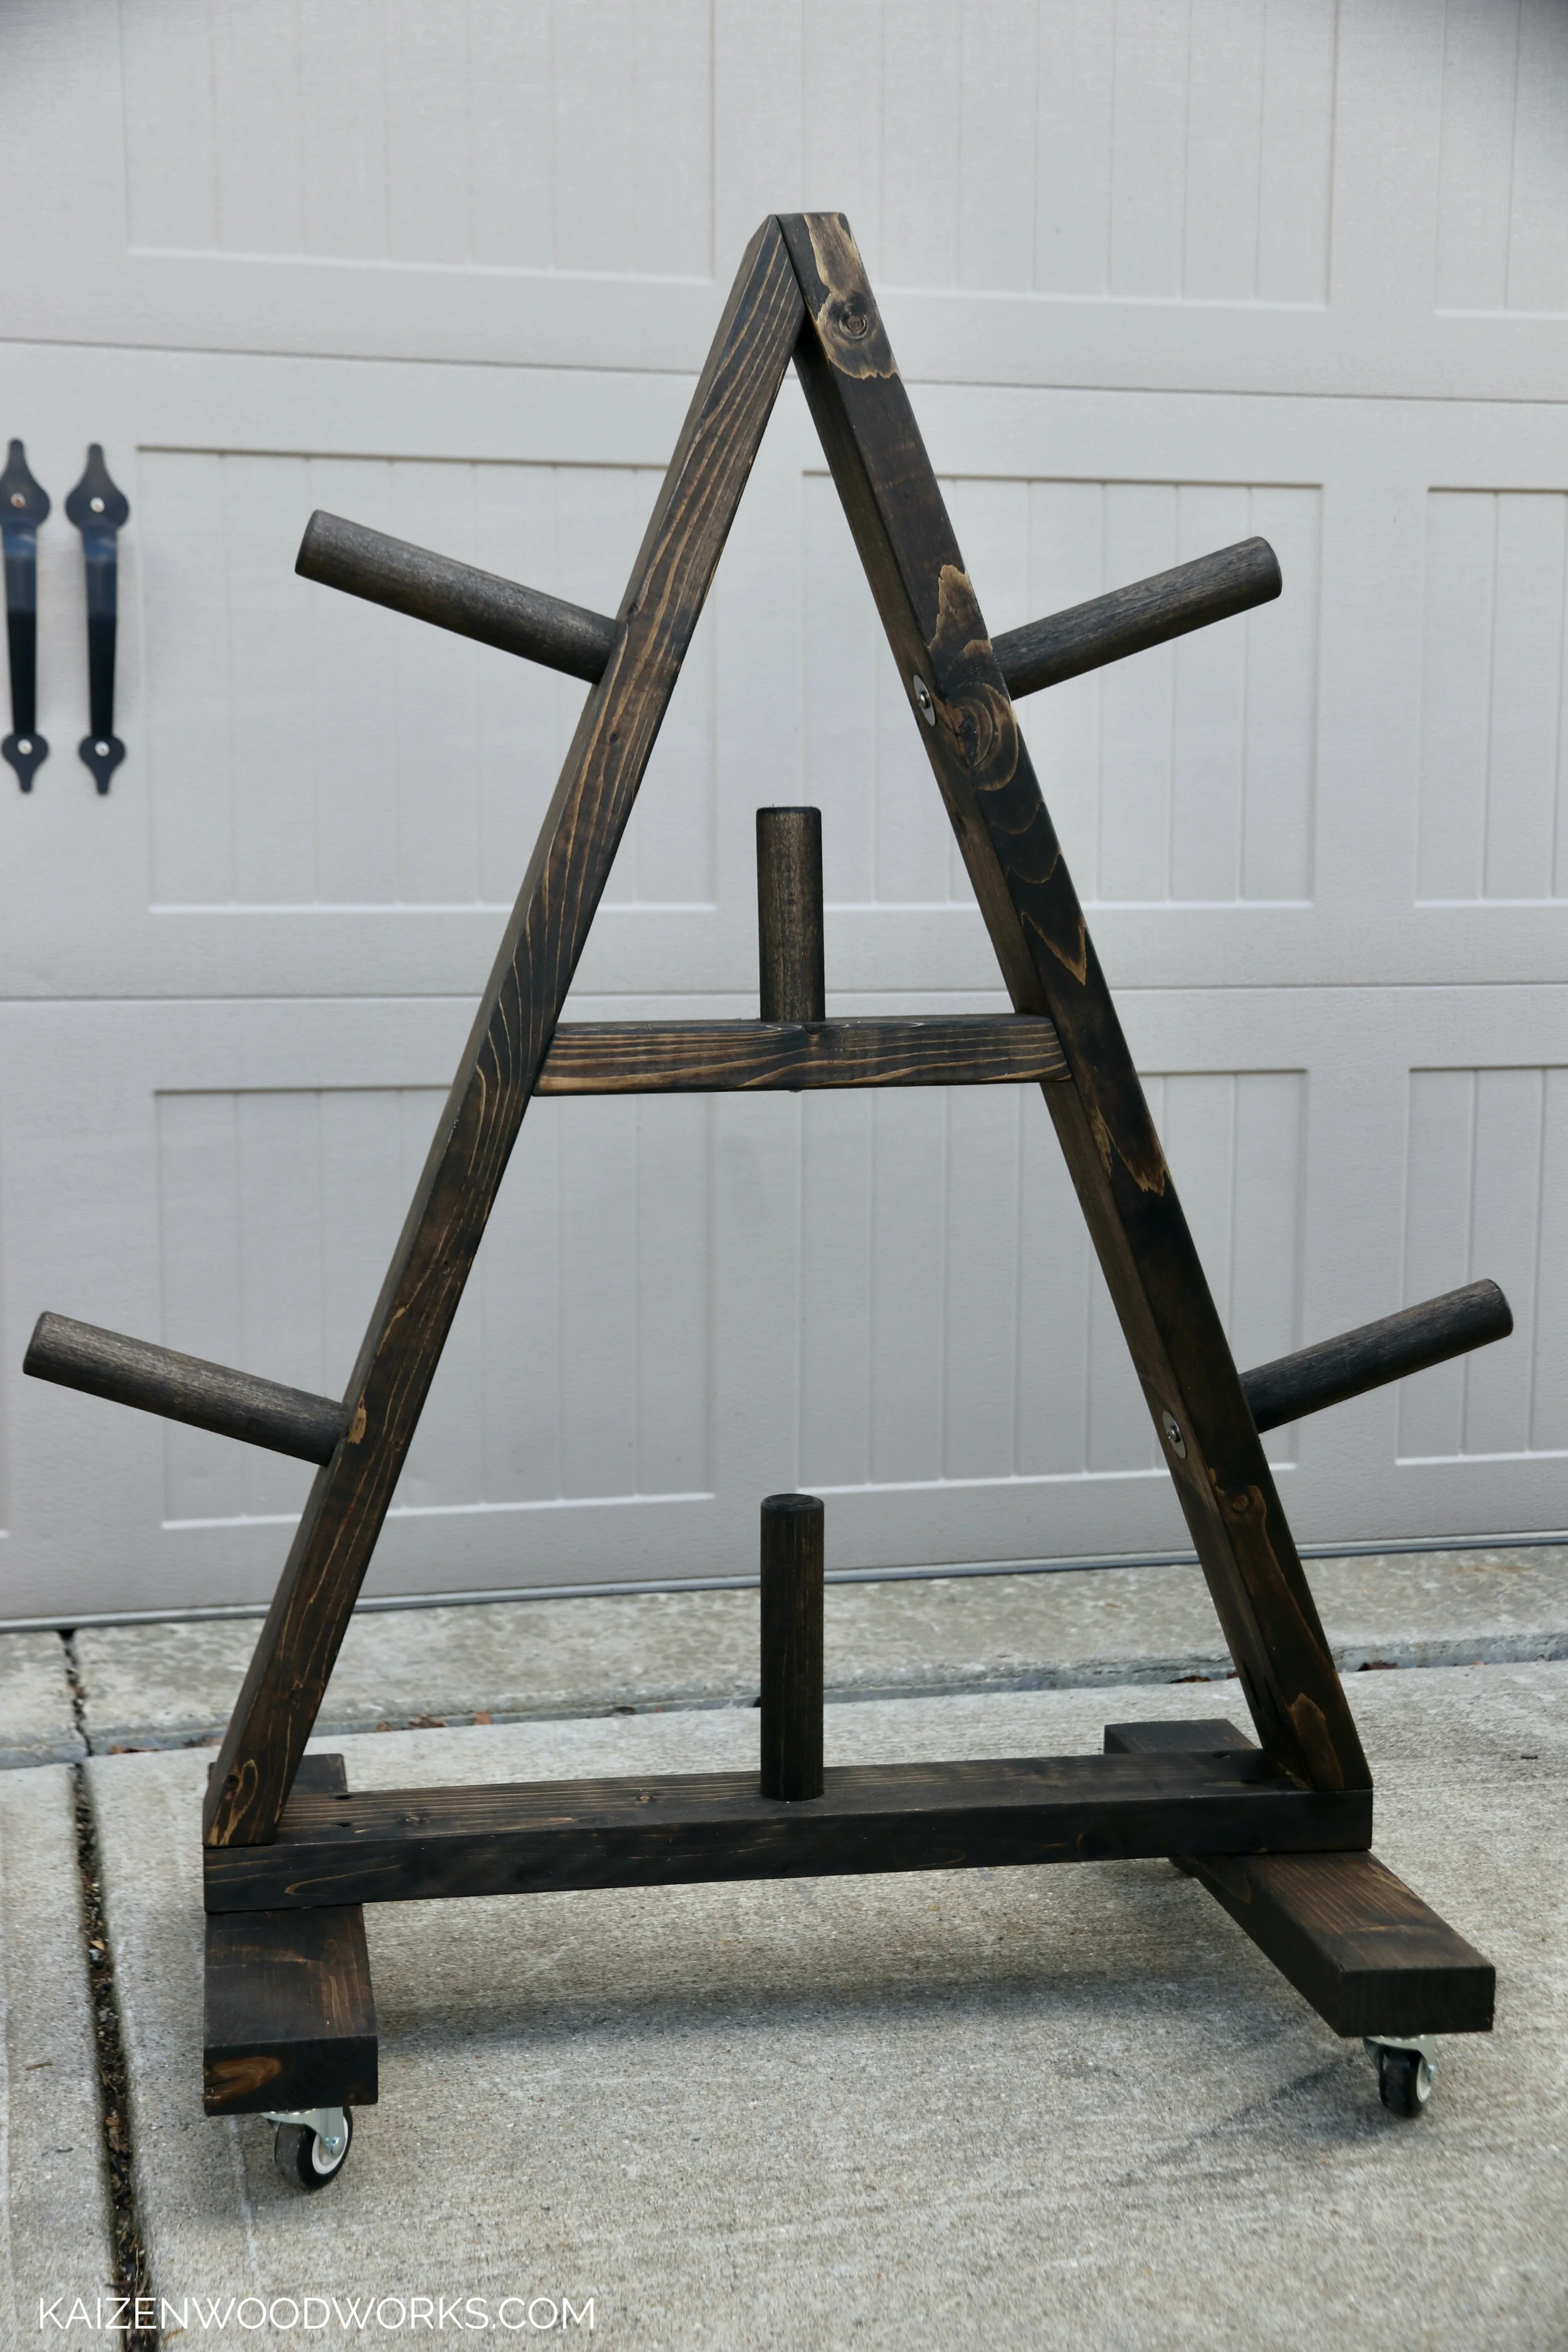
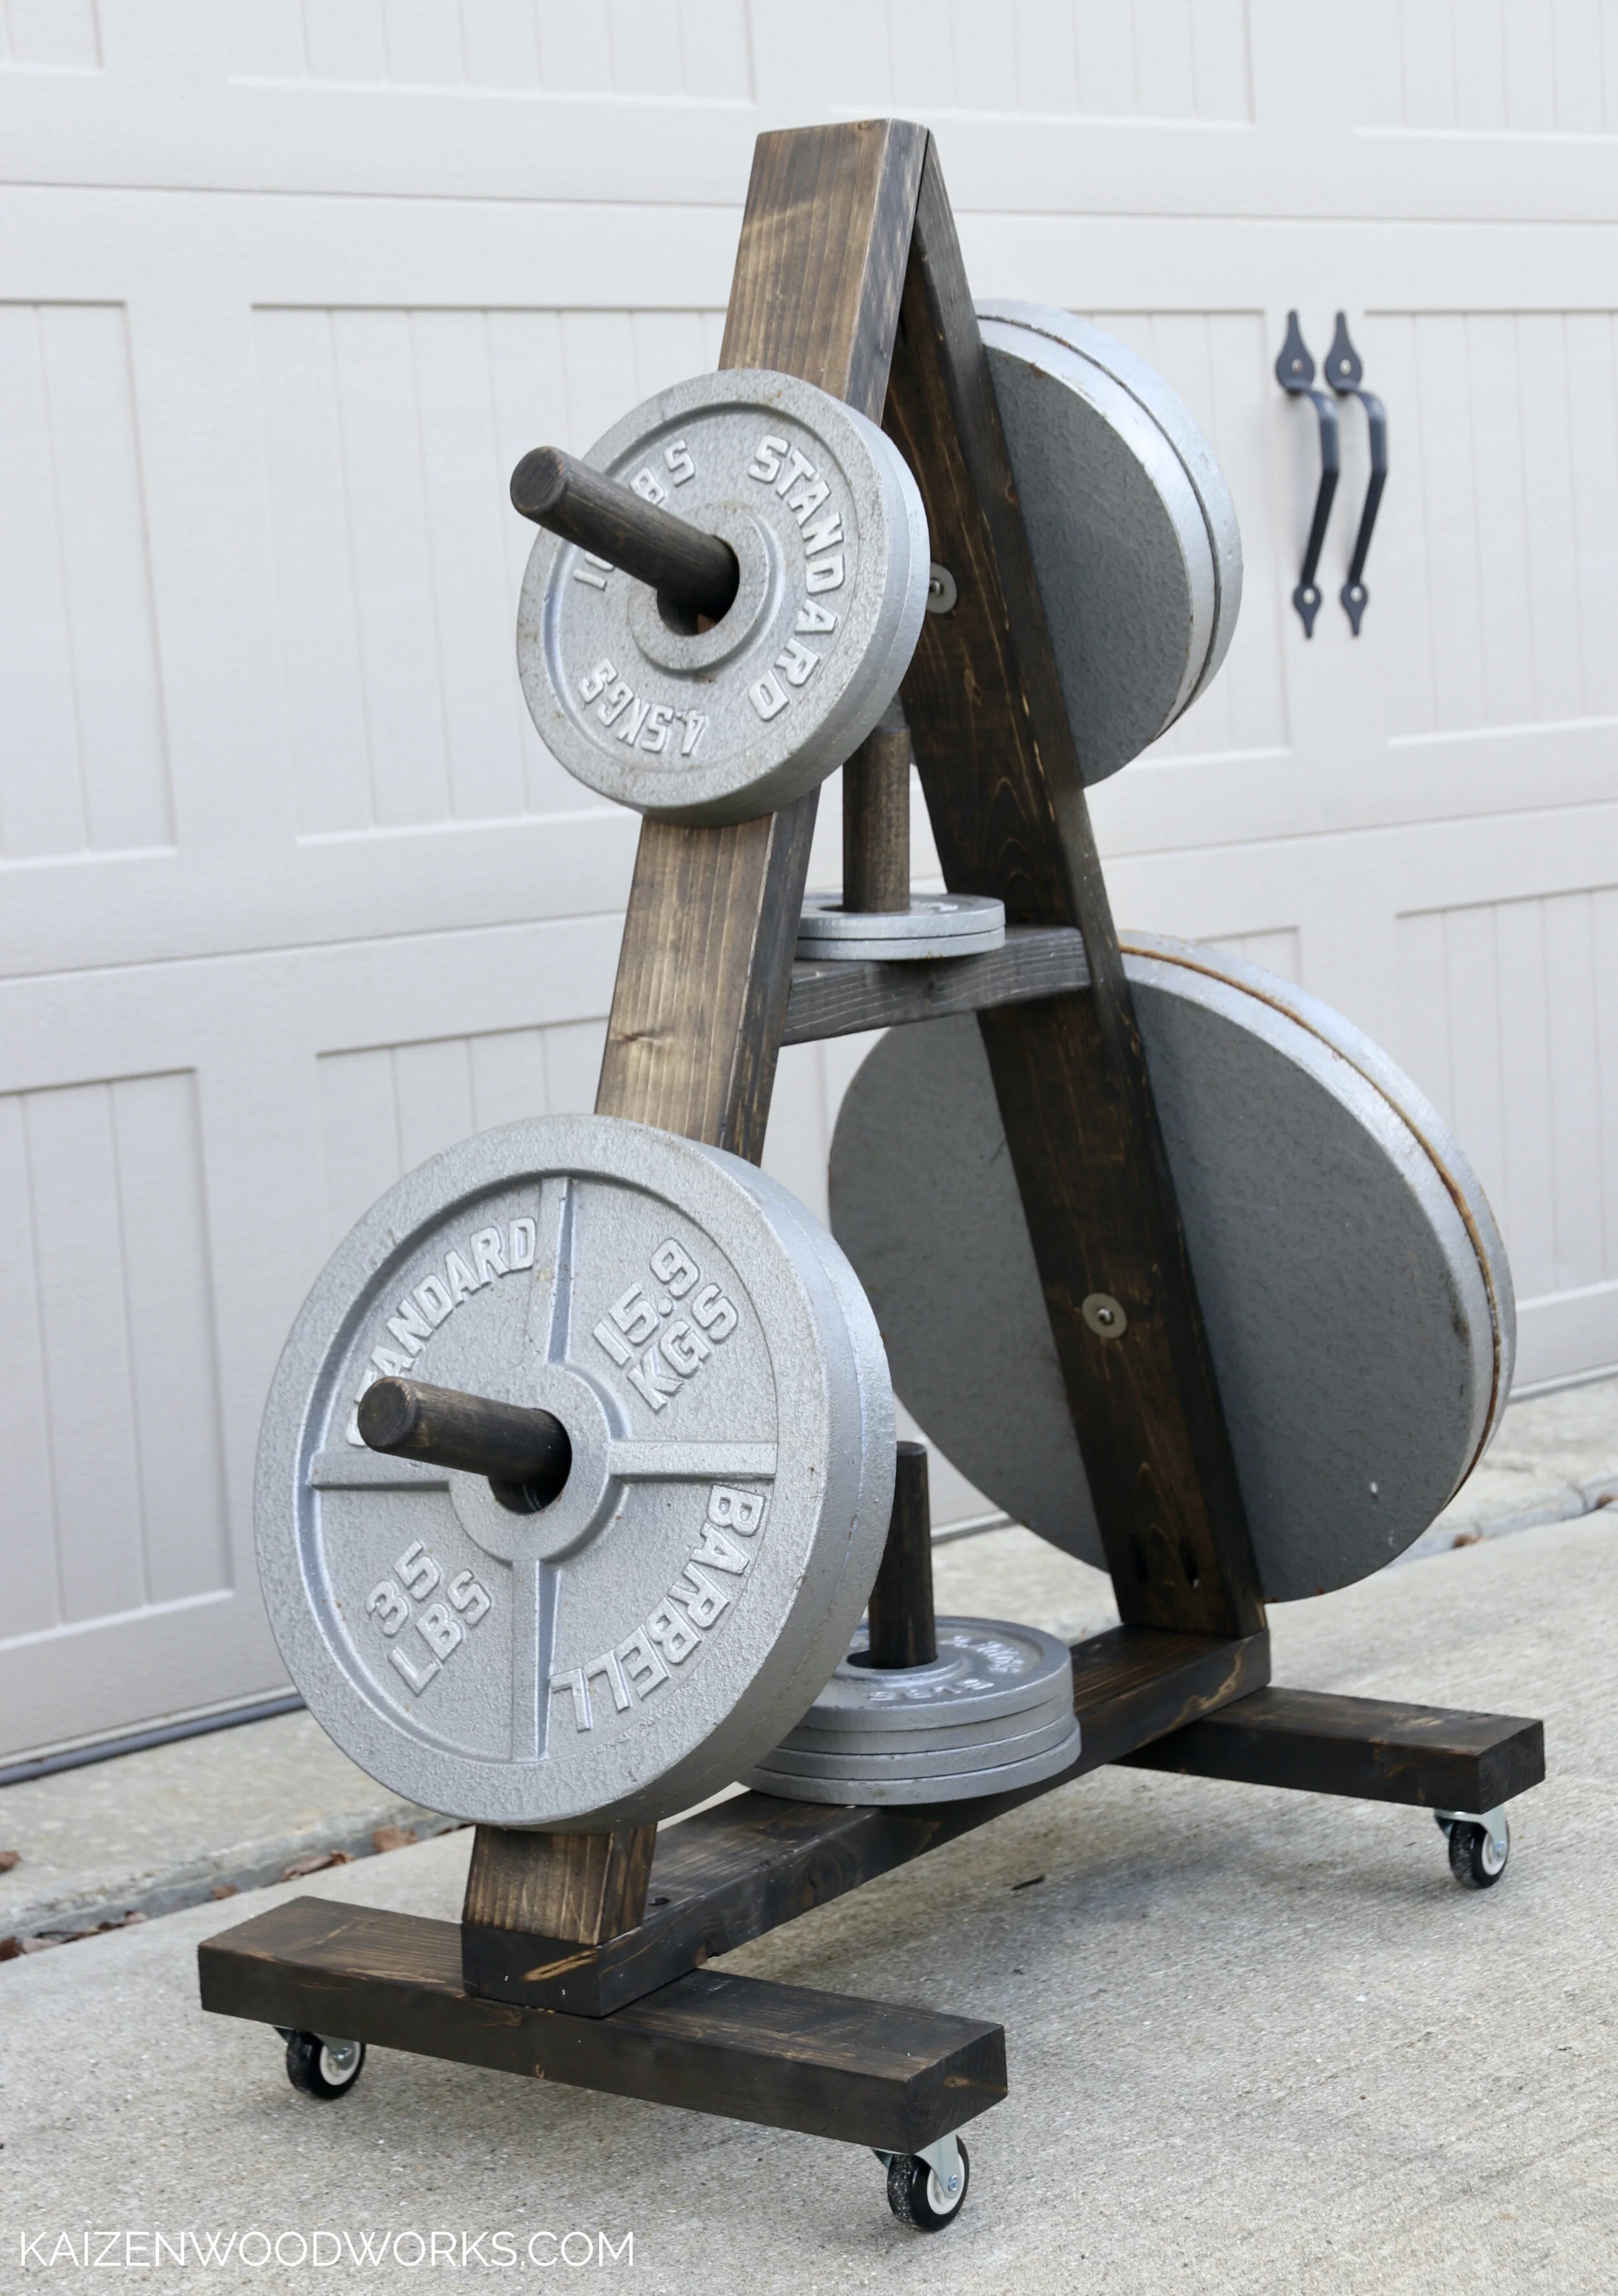
Weight tree for bumper plates
There are many options for storing weights in a gym, but the most common is a weight tree. Weight trees vary widely in style and size. The A frame has been around for a while. It is not my favorite design, but it is simple and gets the job done. In this tutorial, I’ll show you how to make a basic A frame weight tree that can hold a full bumper plate set. The design can be modified to accommodate more weights or fewer weights, to suit your needs.

Difficulty level - medium. Time to build - about 2 hours. This build cost about $33 in materials from my local hardware store. I already had all the tools I needed, but here’s a list of what I used.
The tools I used:
Drill press - alternatively, the holes can also be drilled using a cordless drill
Pocket screw jig (optional)
The materials I used:
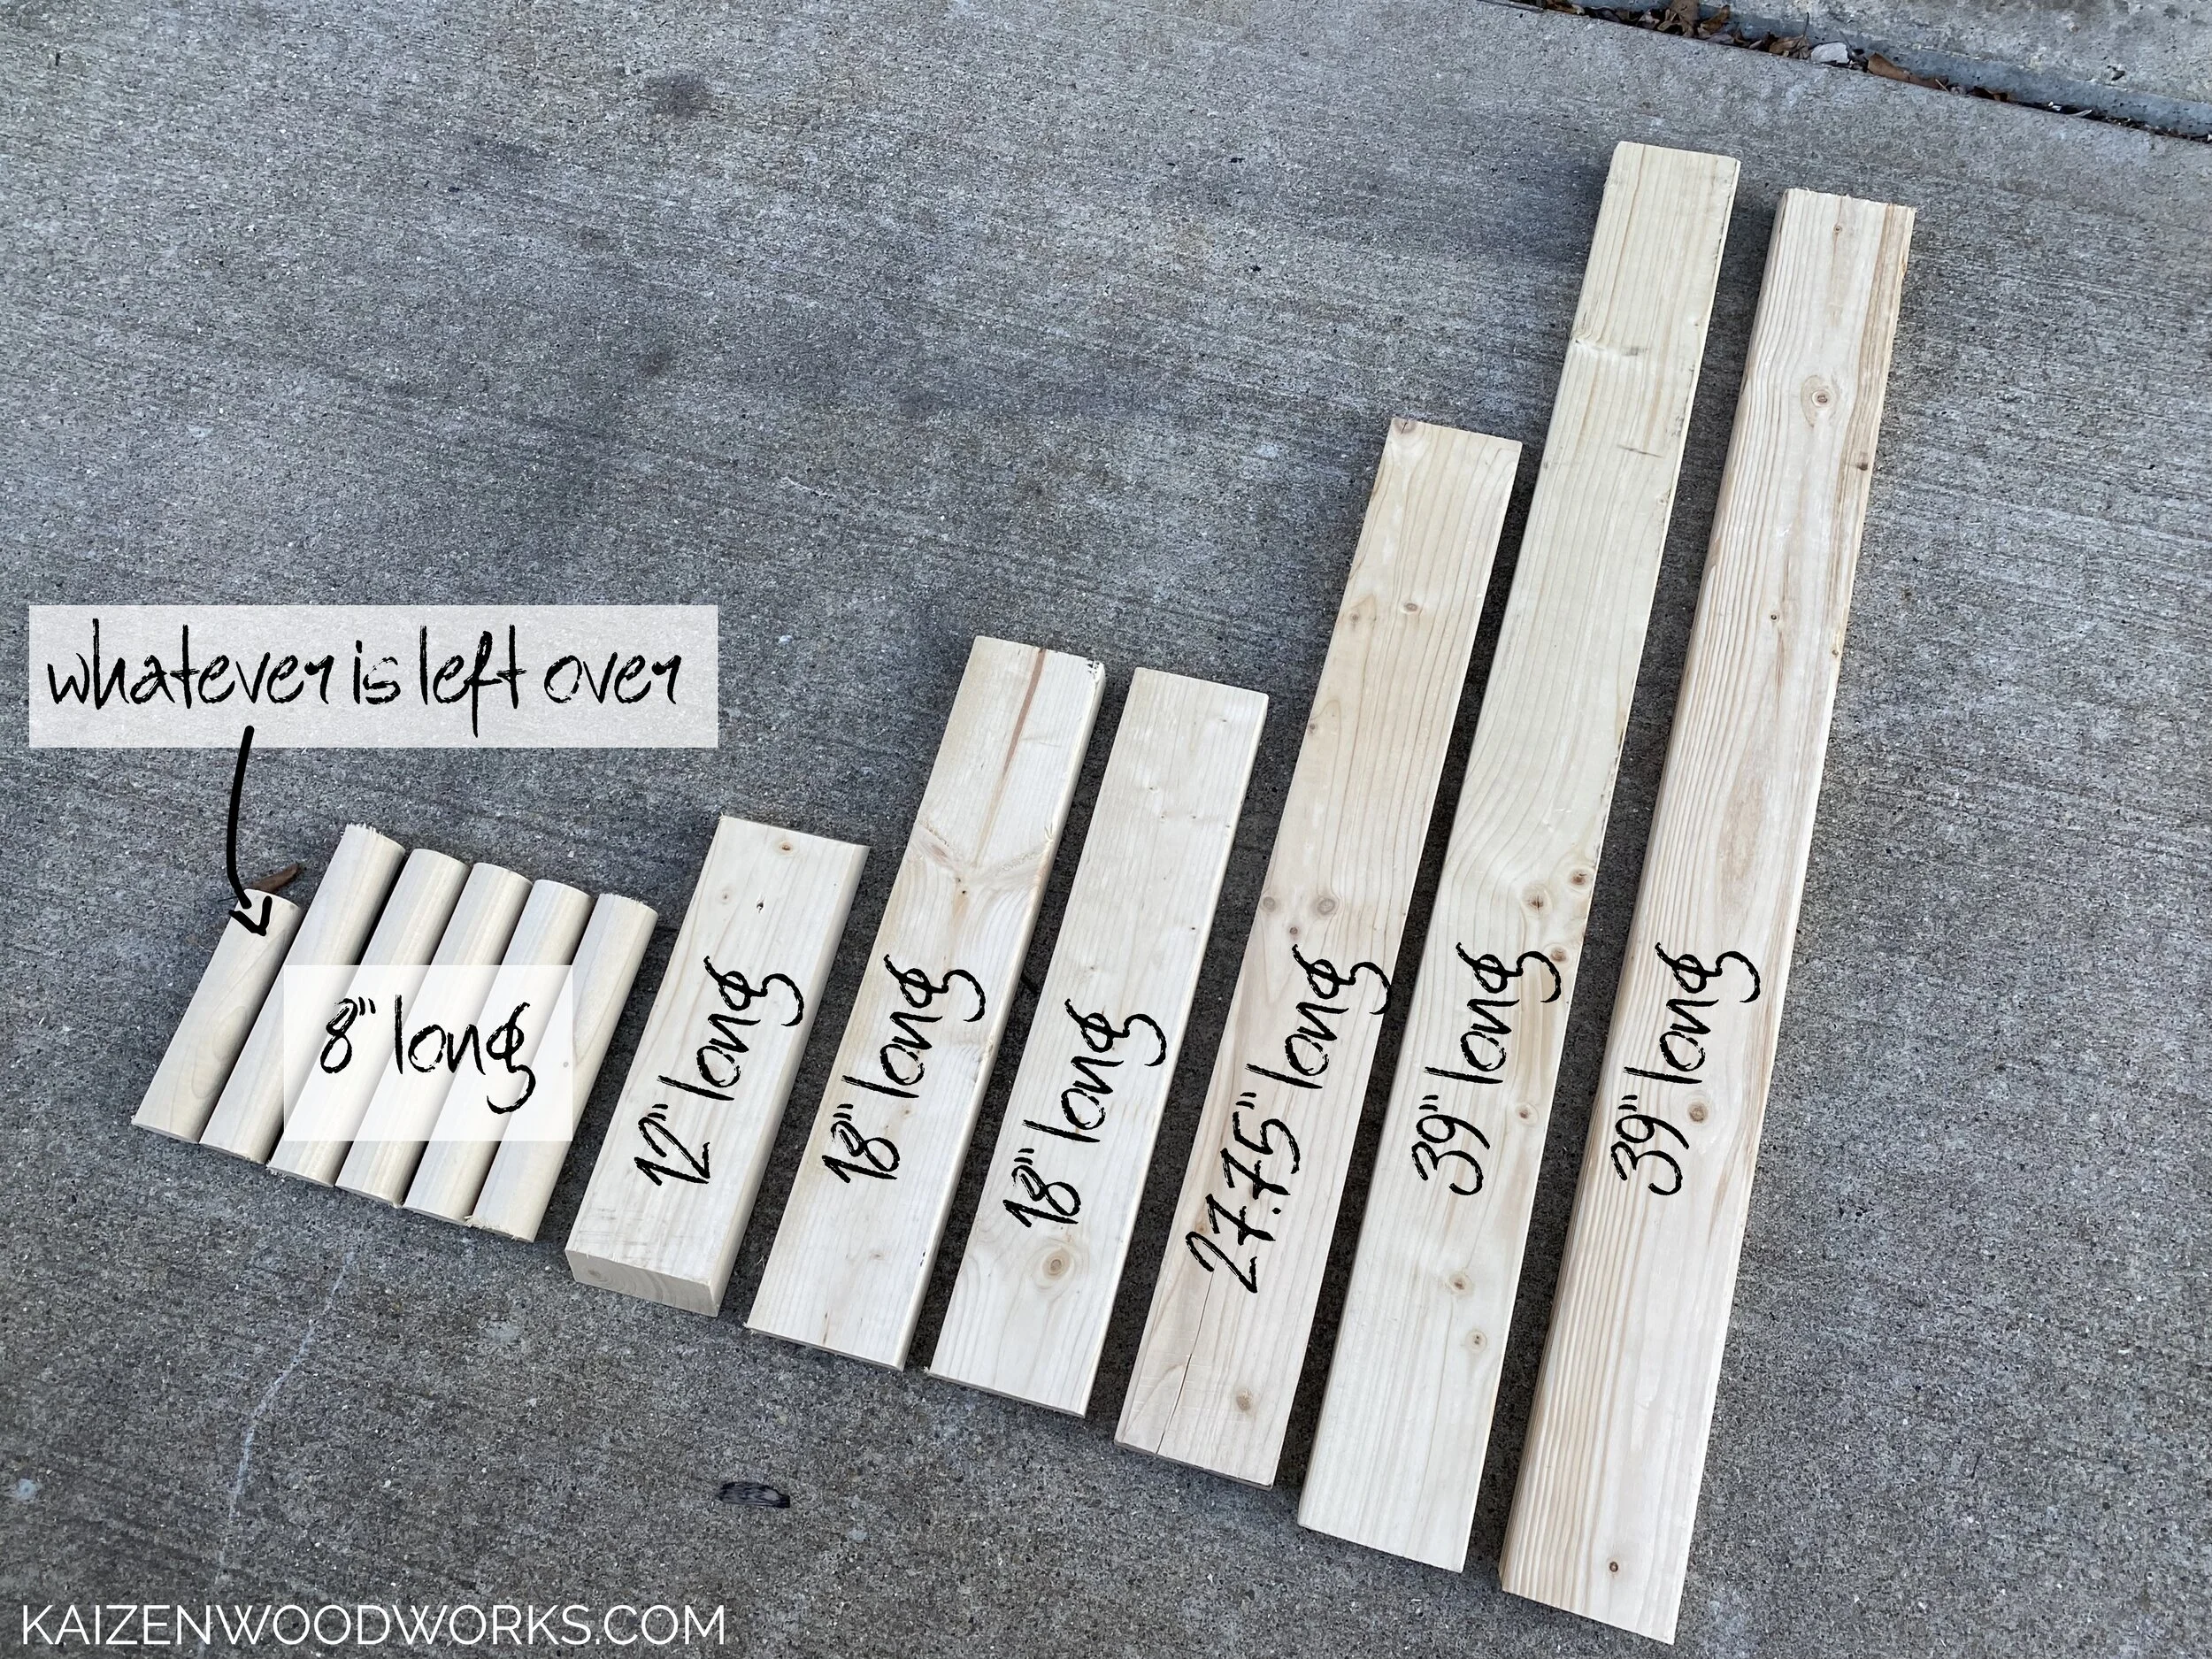
2 - 92” 2x4's
1 - 1.5 x 48” poplar dowel rod
This post is not sponsored. Some of the links are affiliates which means if you purchase through the link, I’ll receive a small commission.

I used my bumper plates to figure out where the pegs will go. If you have iron plates, the sizing is a little different, but these measurements will work for those as well.

Before I assembled anything, I made all of my cuts and drilled all of my holes. In my opinion, it makes the workflow a little bit faster.
Base piece is 27.75” long with 90º cuts. The legs are 18” long with 90º cuts. The side pieces are 39” long, the ends that connect to the bottom are cut at 110º, the tops ends have one side cut at 110º and the other cut at 140º. The short piece on the inside is 12'“ long with two 110º cuts. The 1.5” dowel is cut into 8” pieces, the last piece will measure a little less, I just used it as is.
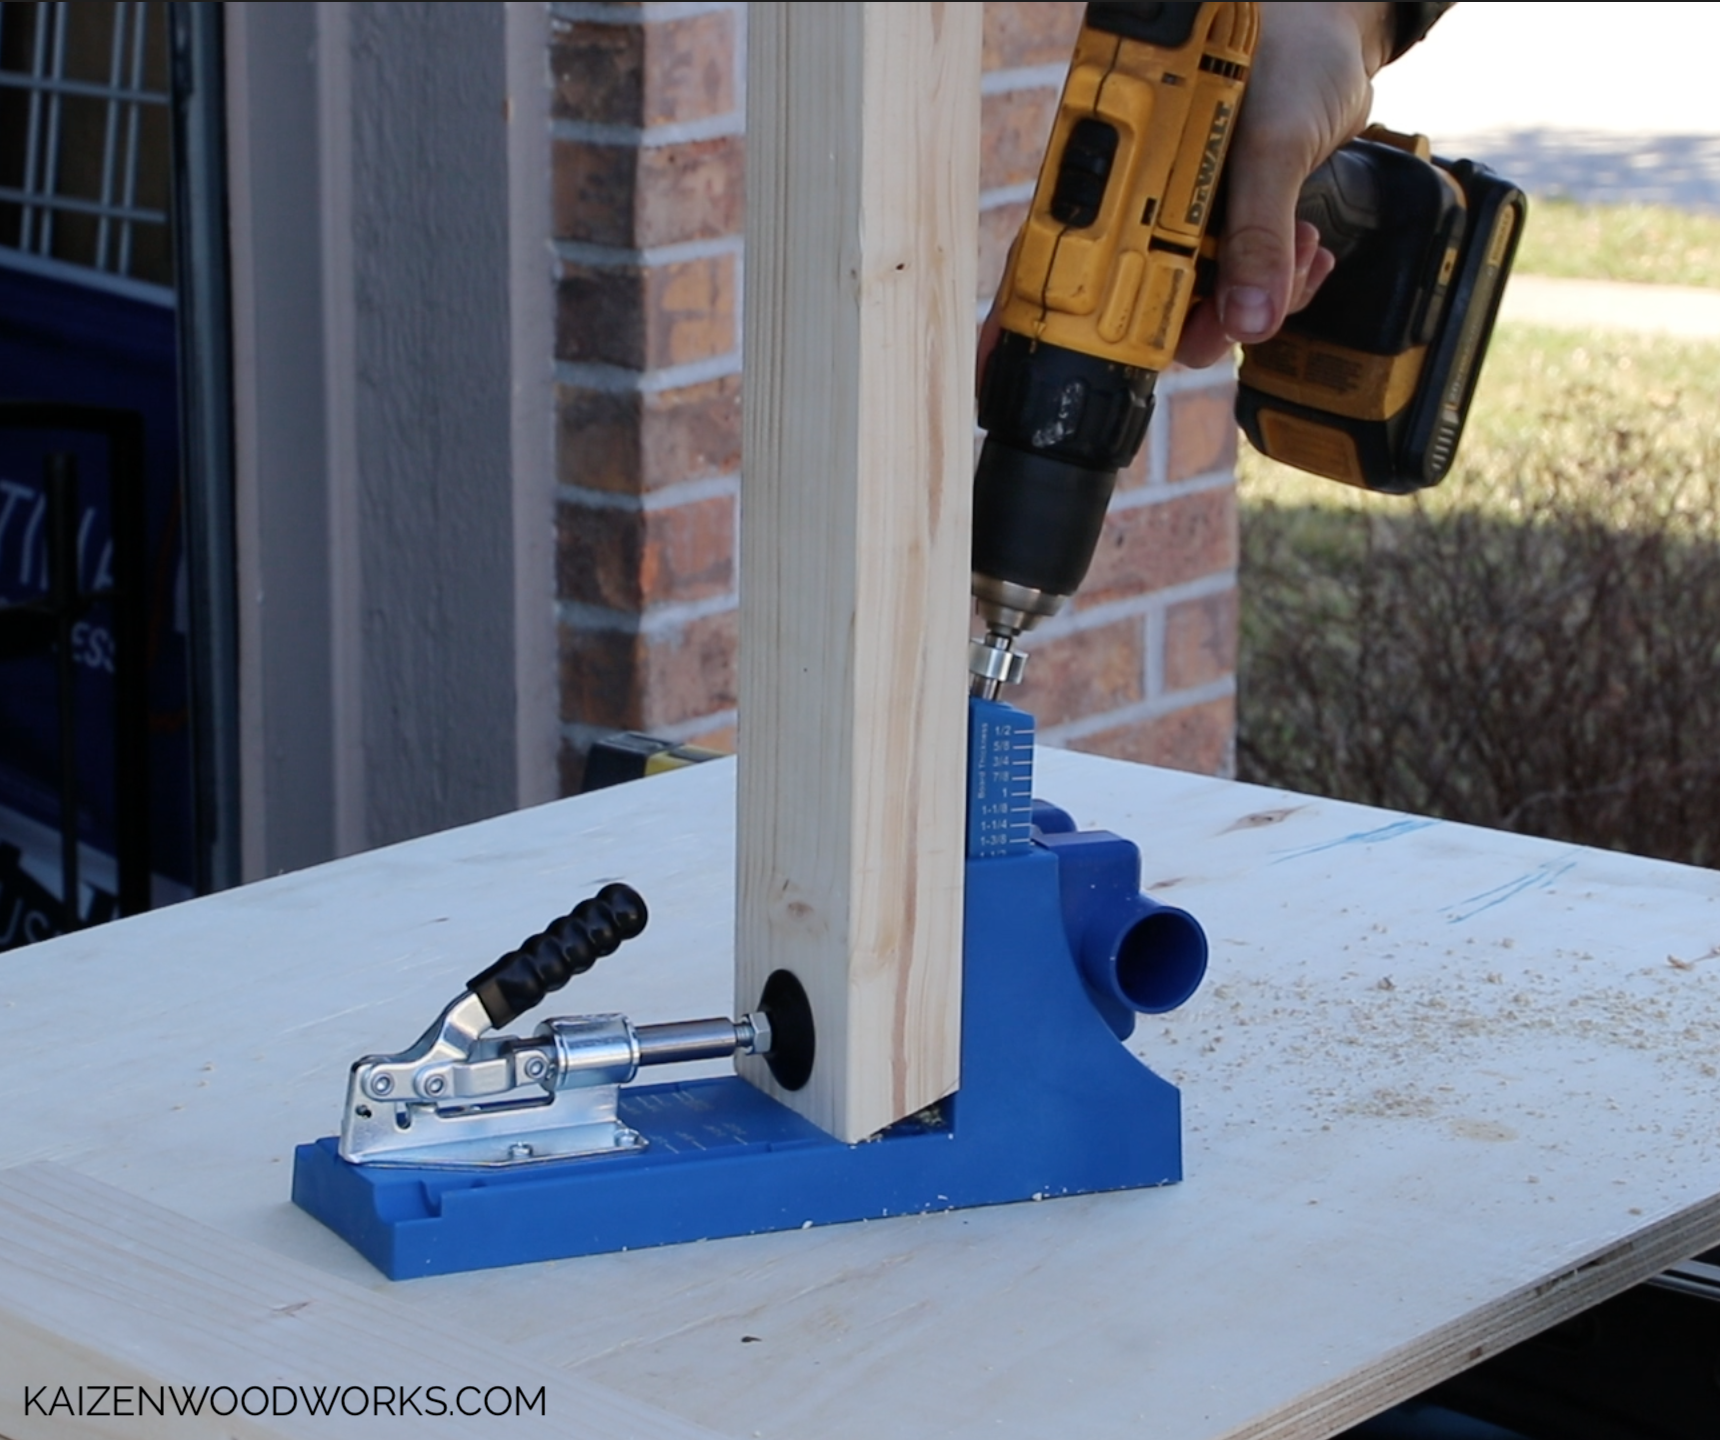
I use the Kreg jig to make the pocket holes to connect the pieces together. This is optional and is only really necessary when you’re trying to hide the screws that connect the pieces together.

I use a 1.5” forstner bit to drill the holes for the weight pegs. I only go about 3/4 of the way through the 2x4. The holes are at 9” and 28” from the bottom.

After drilling the holes with the forstner bit, I take a 1/8” drill bit and drill through the center of the hole. This is where the screws will go.

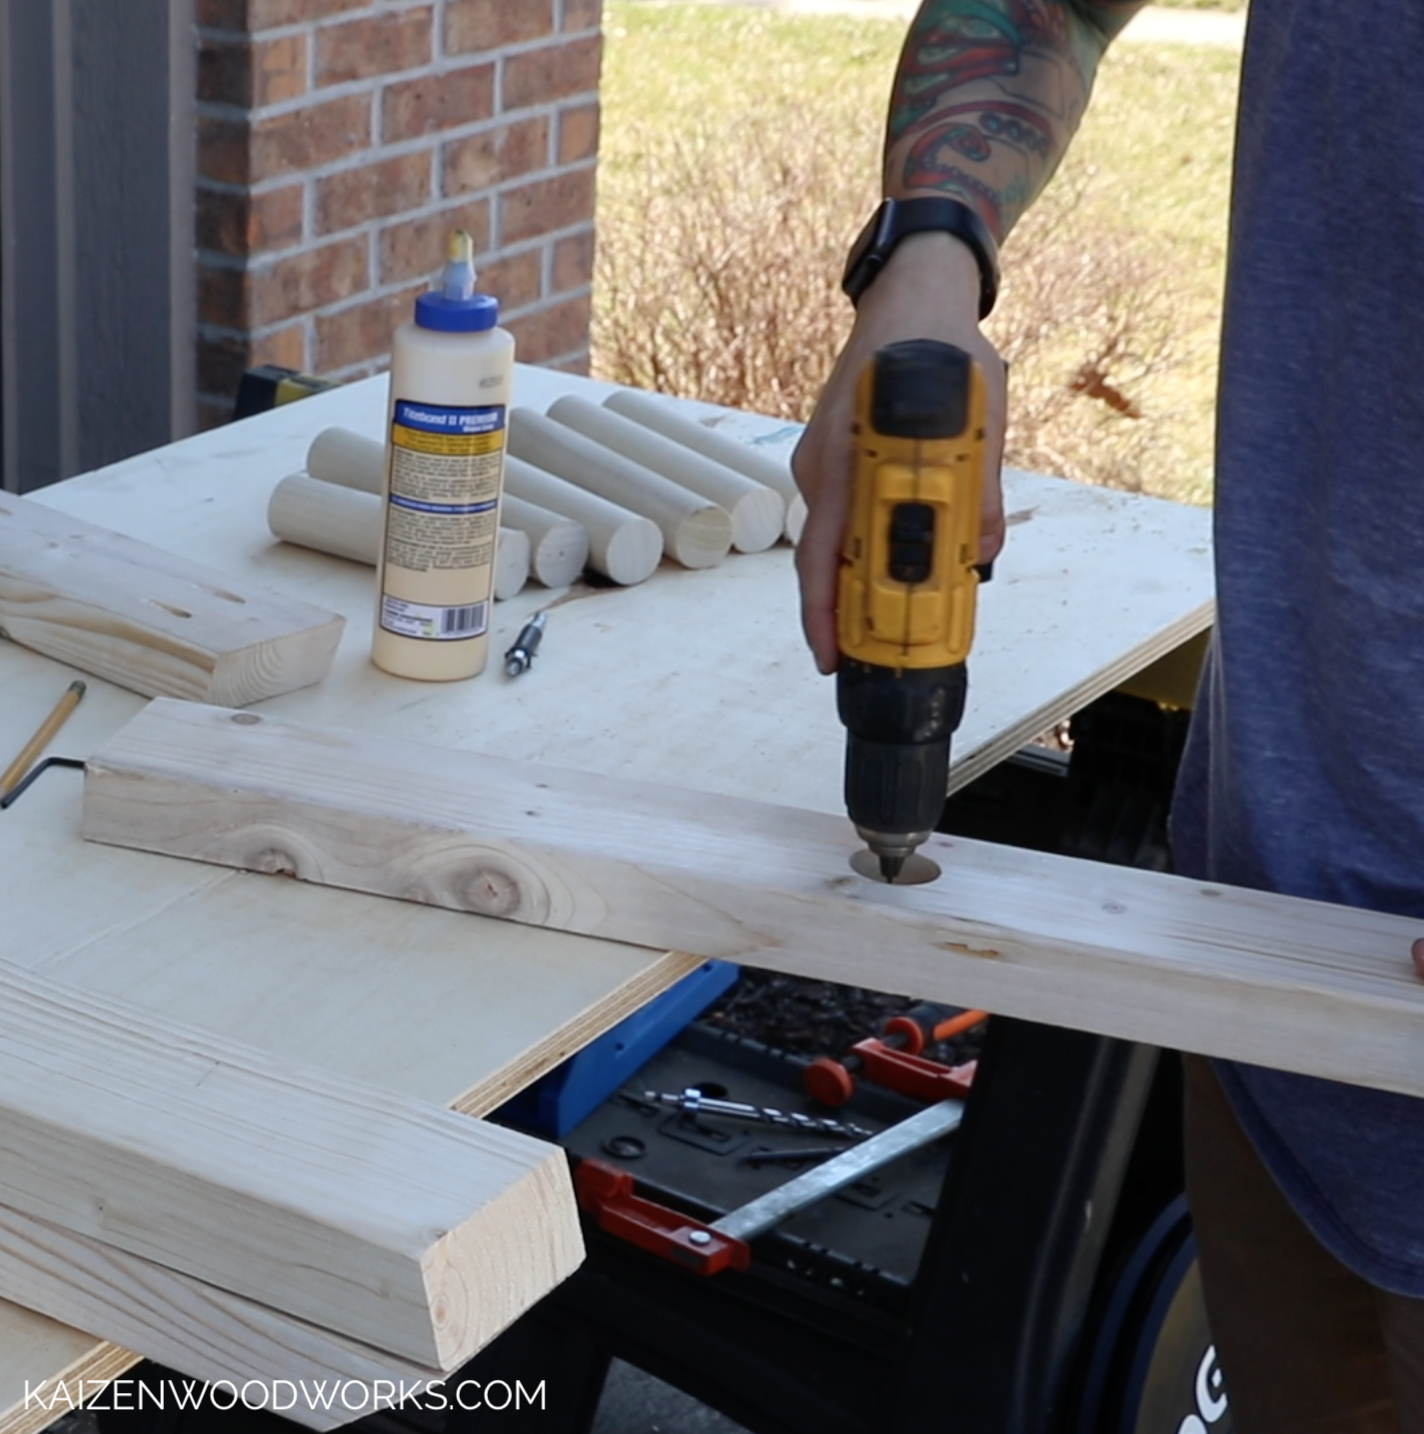
I use a round over bit on my router for the ends of the dowel rods that will be facing out. This is not necessary, but adds more of a finished look.


I add wood glue to the holes before inserting the dowel rods. After that I flip them over and drill pilot holes for the sheet metal screws.

Drilling the pilot holes before hand helps the screws go in smoothly.
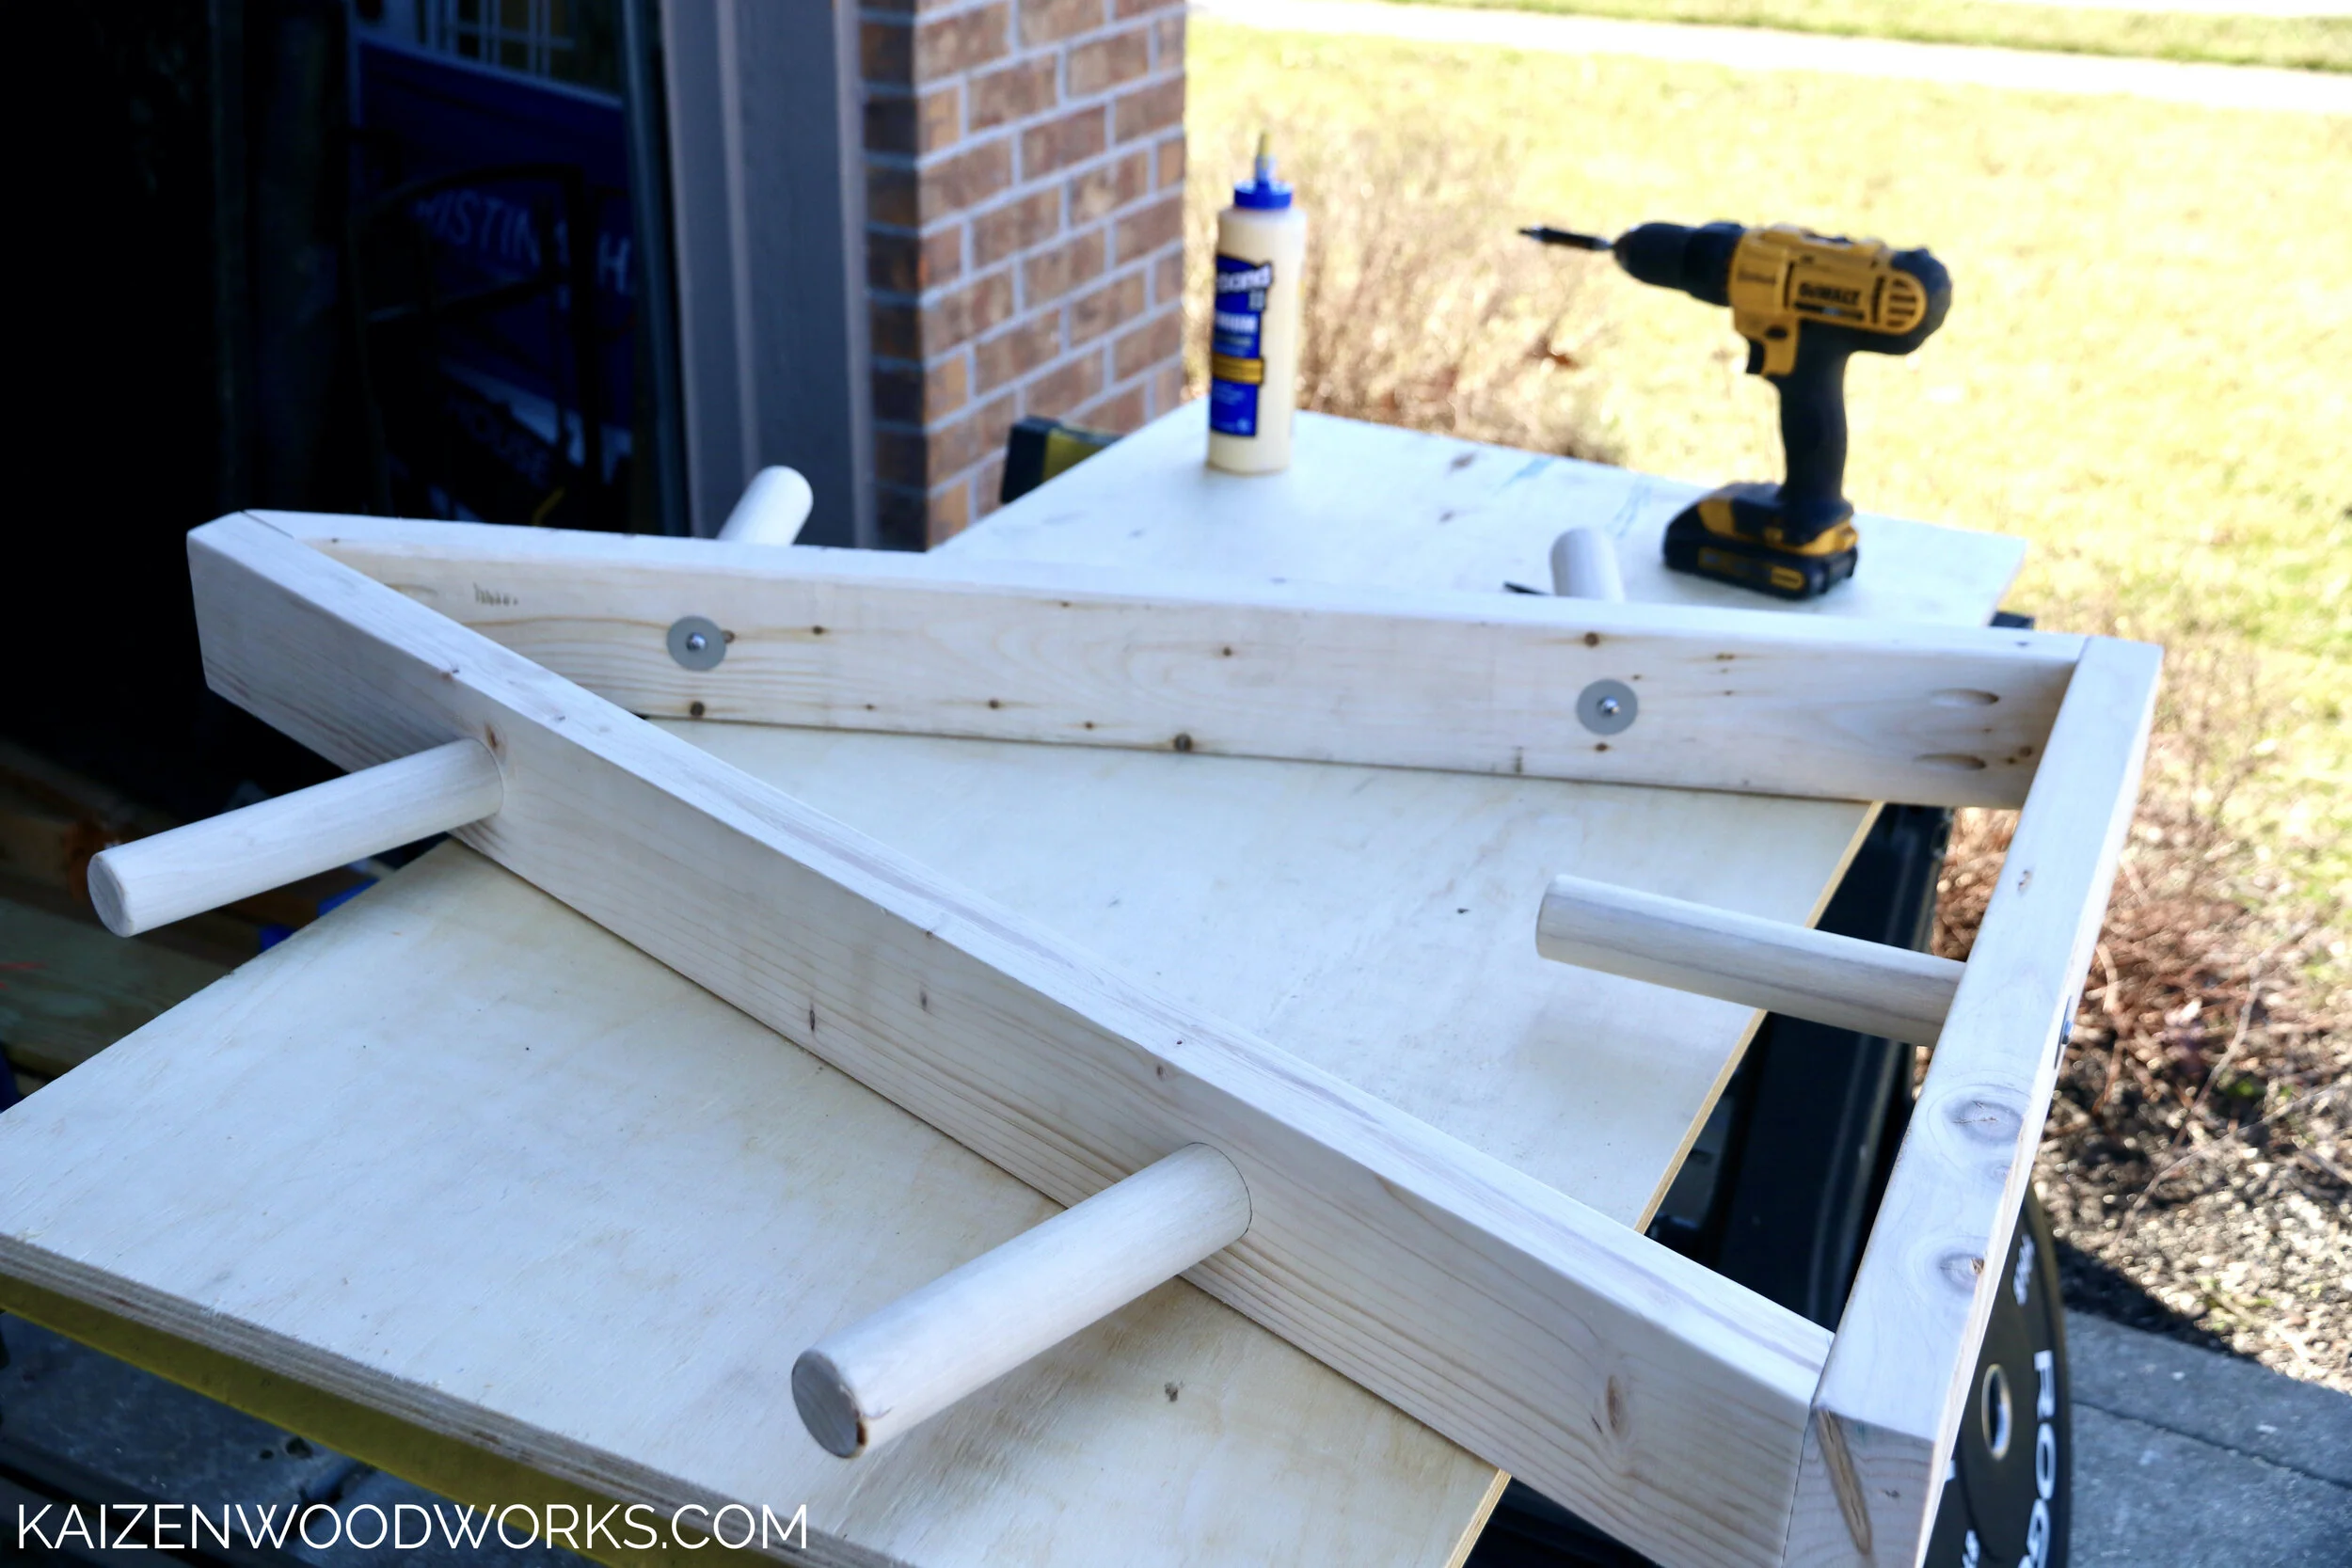
Once the pocket screws are in, I add a couple more 3” screws in through the bottom piece that go up into the sides.
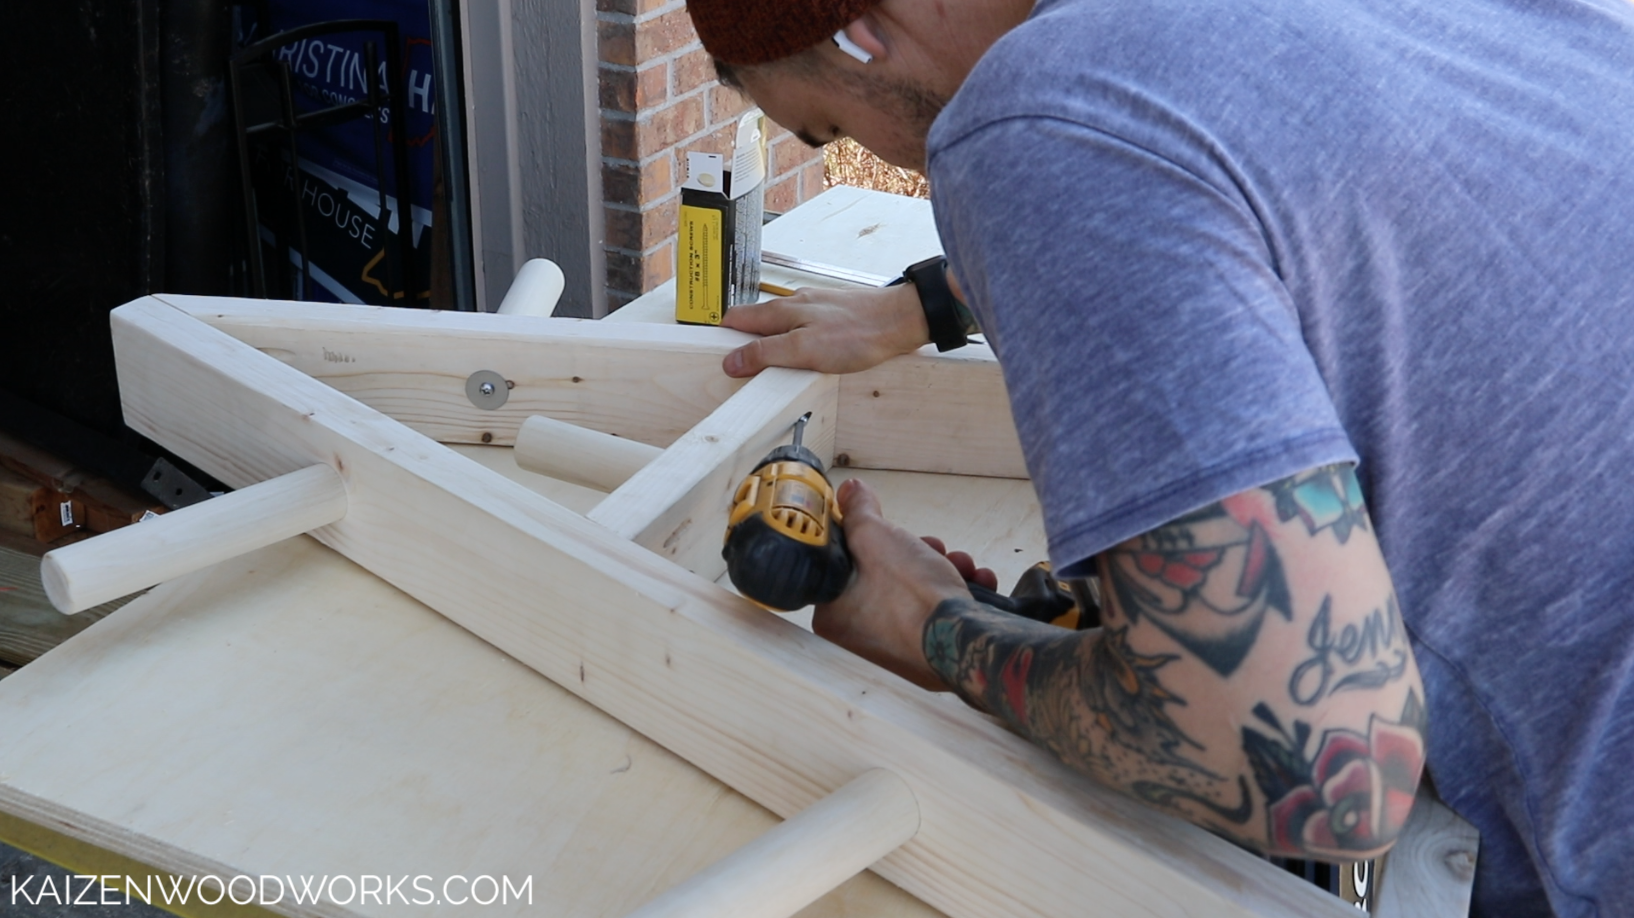

When the legs go on, I add glue and put four 3” screws in through the bottom and two 3” screws in through the top on each one.

I use 220 grit sandpaper with my palm sander to smooth any rough edges. After that it is ready for for the gym.
Staining and installing wheels are optional. For all intents and purposes, the weight tree is done and can now be used in the gym.

I love the natural look, but for this project I am going to add ebony wood stain and wheels.
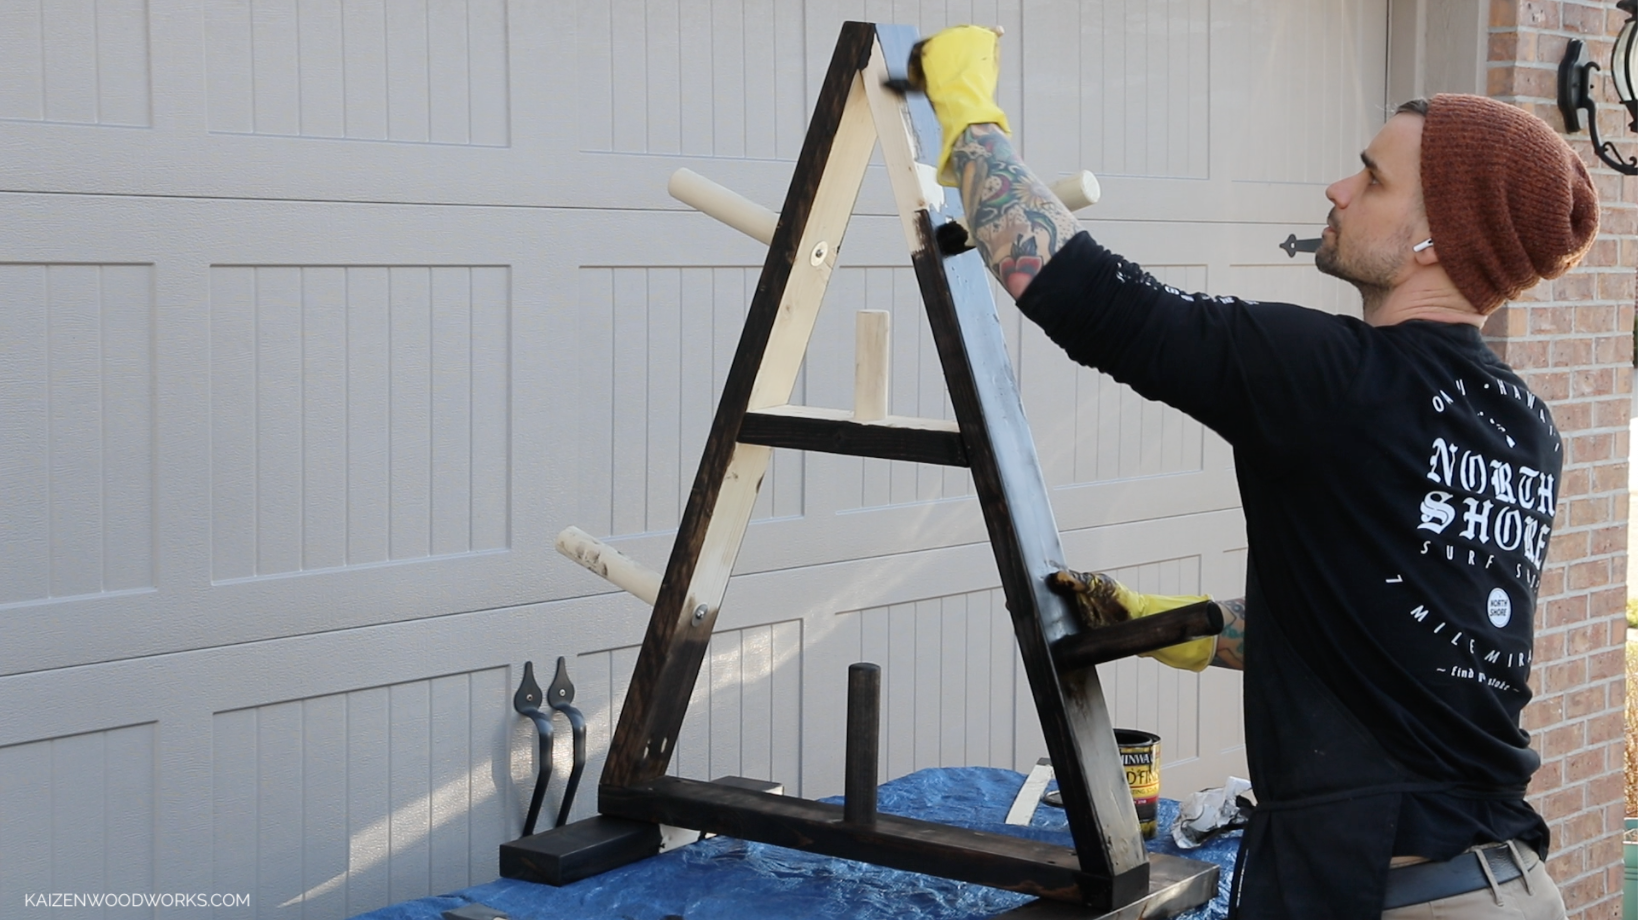
I let the wood stain dry for a day before adding the wheels.
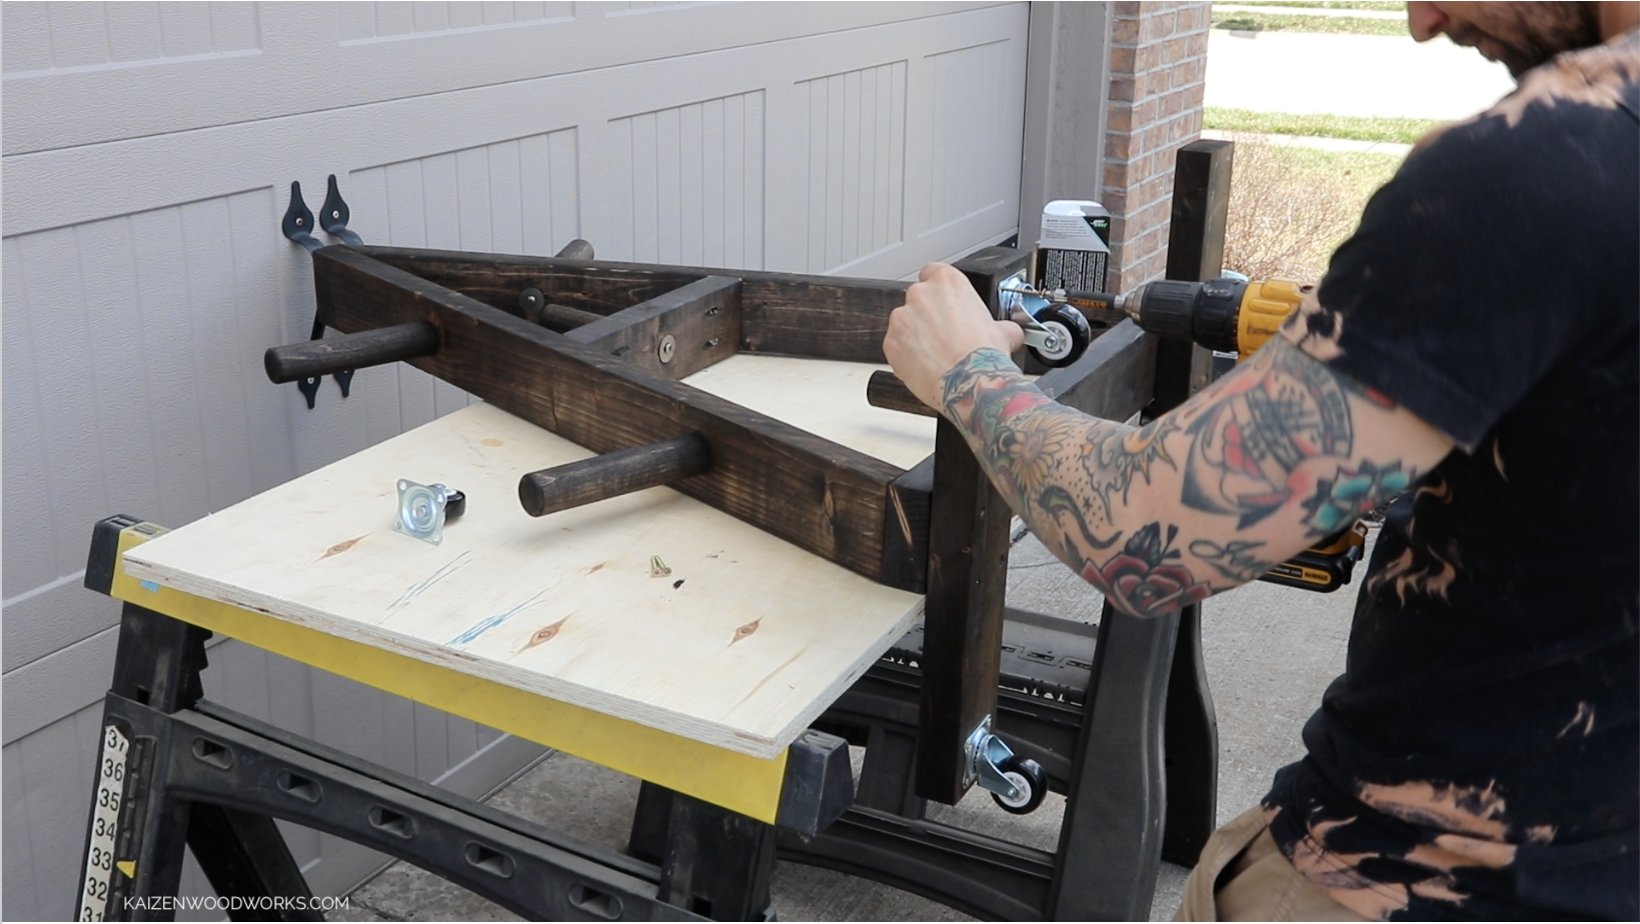
I add 2” swivel wheels. They’re rated to handle 80 pounds each, so 320 pounds total. Once the weight is on, they don’t roll great. If I was to do this all again I’d get bigger wheels.
This post is not sponsored. Some of the links are affiliates which means if you purchase through the link, I’ll receive a small commission.
If you like this, check out my other home gym diy projects.
Do you have an idea for my next build? Leave a comment below!
If you build this, I’d love to see it! Tag #kaizendiygym on Instagram and I’ll feature it on my page!
https://www.instagram.com/kaizendiygym
@kaizendiygym