
Belt Squat Platform
Belt squats are a great option for people with lower back issues. It allows the lifter to work the legs without putting pressure on the spine. The problem is that belt squat machines can cost a small fortune and take up a lot of space. It took me some time to figure out how to make it work, But I got it - a belt squat platform that is small, versatile, and won’t break the bank.
Cost of materials will vary based on fluctuating lumber prices and your location. There are lots of options on what tools and materials can be used to make this, here’s what I used:
Tools:
Dewalt sliding mitre saw - Amazon link (https://amzn.to/3pdqFe3), Home Depot link (https://homedepot.sjv.io/3P7GRB)
Dewalt cordless drill - Amazon link (https://amzn.to/3g2VM7L), Home Depot link (https://homedepot.sjv.io/doRm3K)
Bosch cordless drill set - Amazon link (https://amzn.to/2TGLLpz)
Drill press - Amazon link (https://amzn.to/3wh8beK), Home Depot link (homedepot.sjv.io/doRm3K) - alternatively, the holes can also be drilled using a cordless drill
1.5 inch forstner bit - Amazon link (https://amzn.to/3hnU2Ih), Home Depot link (https://homedepot.sjv.io/gbDRxg)
.5 inch Forster bit - Amazon link (https://amzn.to/2VkmulJ), Home Depot link (https://homedepot.sjv.io/BXx57J)
1/4 inch roundover bit - Amazon link (https://amzn.to/3jPEHSo), Home Depot link (https://homedepot.sjv.io/NKzG71)
Wood clamps - Amazon link (https://amzn.to/3xfySB8), Home Depot link (homedepot.sjv.io/jW1vD5)
Countersink drill bit - Amazon link (https://amzn.to/35Qwq8k), Home Depot link (https://homedepot.sjv.io/9WeXx3)
Materials:
3 - 7ft 2x4 - Home Depot link (https://homedepot.sjv.io/x9ynL1)
1/2 inch thick plywood 2’x4’ (https://homedepot.sjv.io/a15KNR)
3.5 inch pulley wheel (https://amzn.to/2TLN0E7)
2 - 1/2 inch 3/8 chrome spacers - (https://homedepot.sjv.io/b3G7kv)
5.5 inch long 3/8 bolts (https://amzn.to/3wnltGj)
3/8 16 lock nut (https://amzn.to/3wrGL5H)
1.5 inch dowel (https://homedepot.sjv.io/n1nGPM)
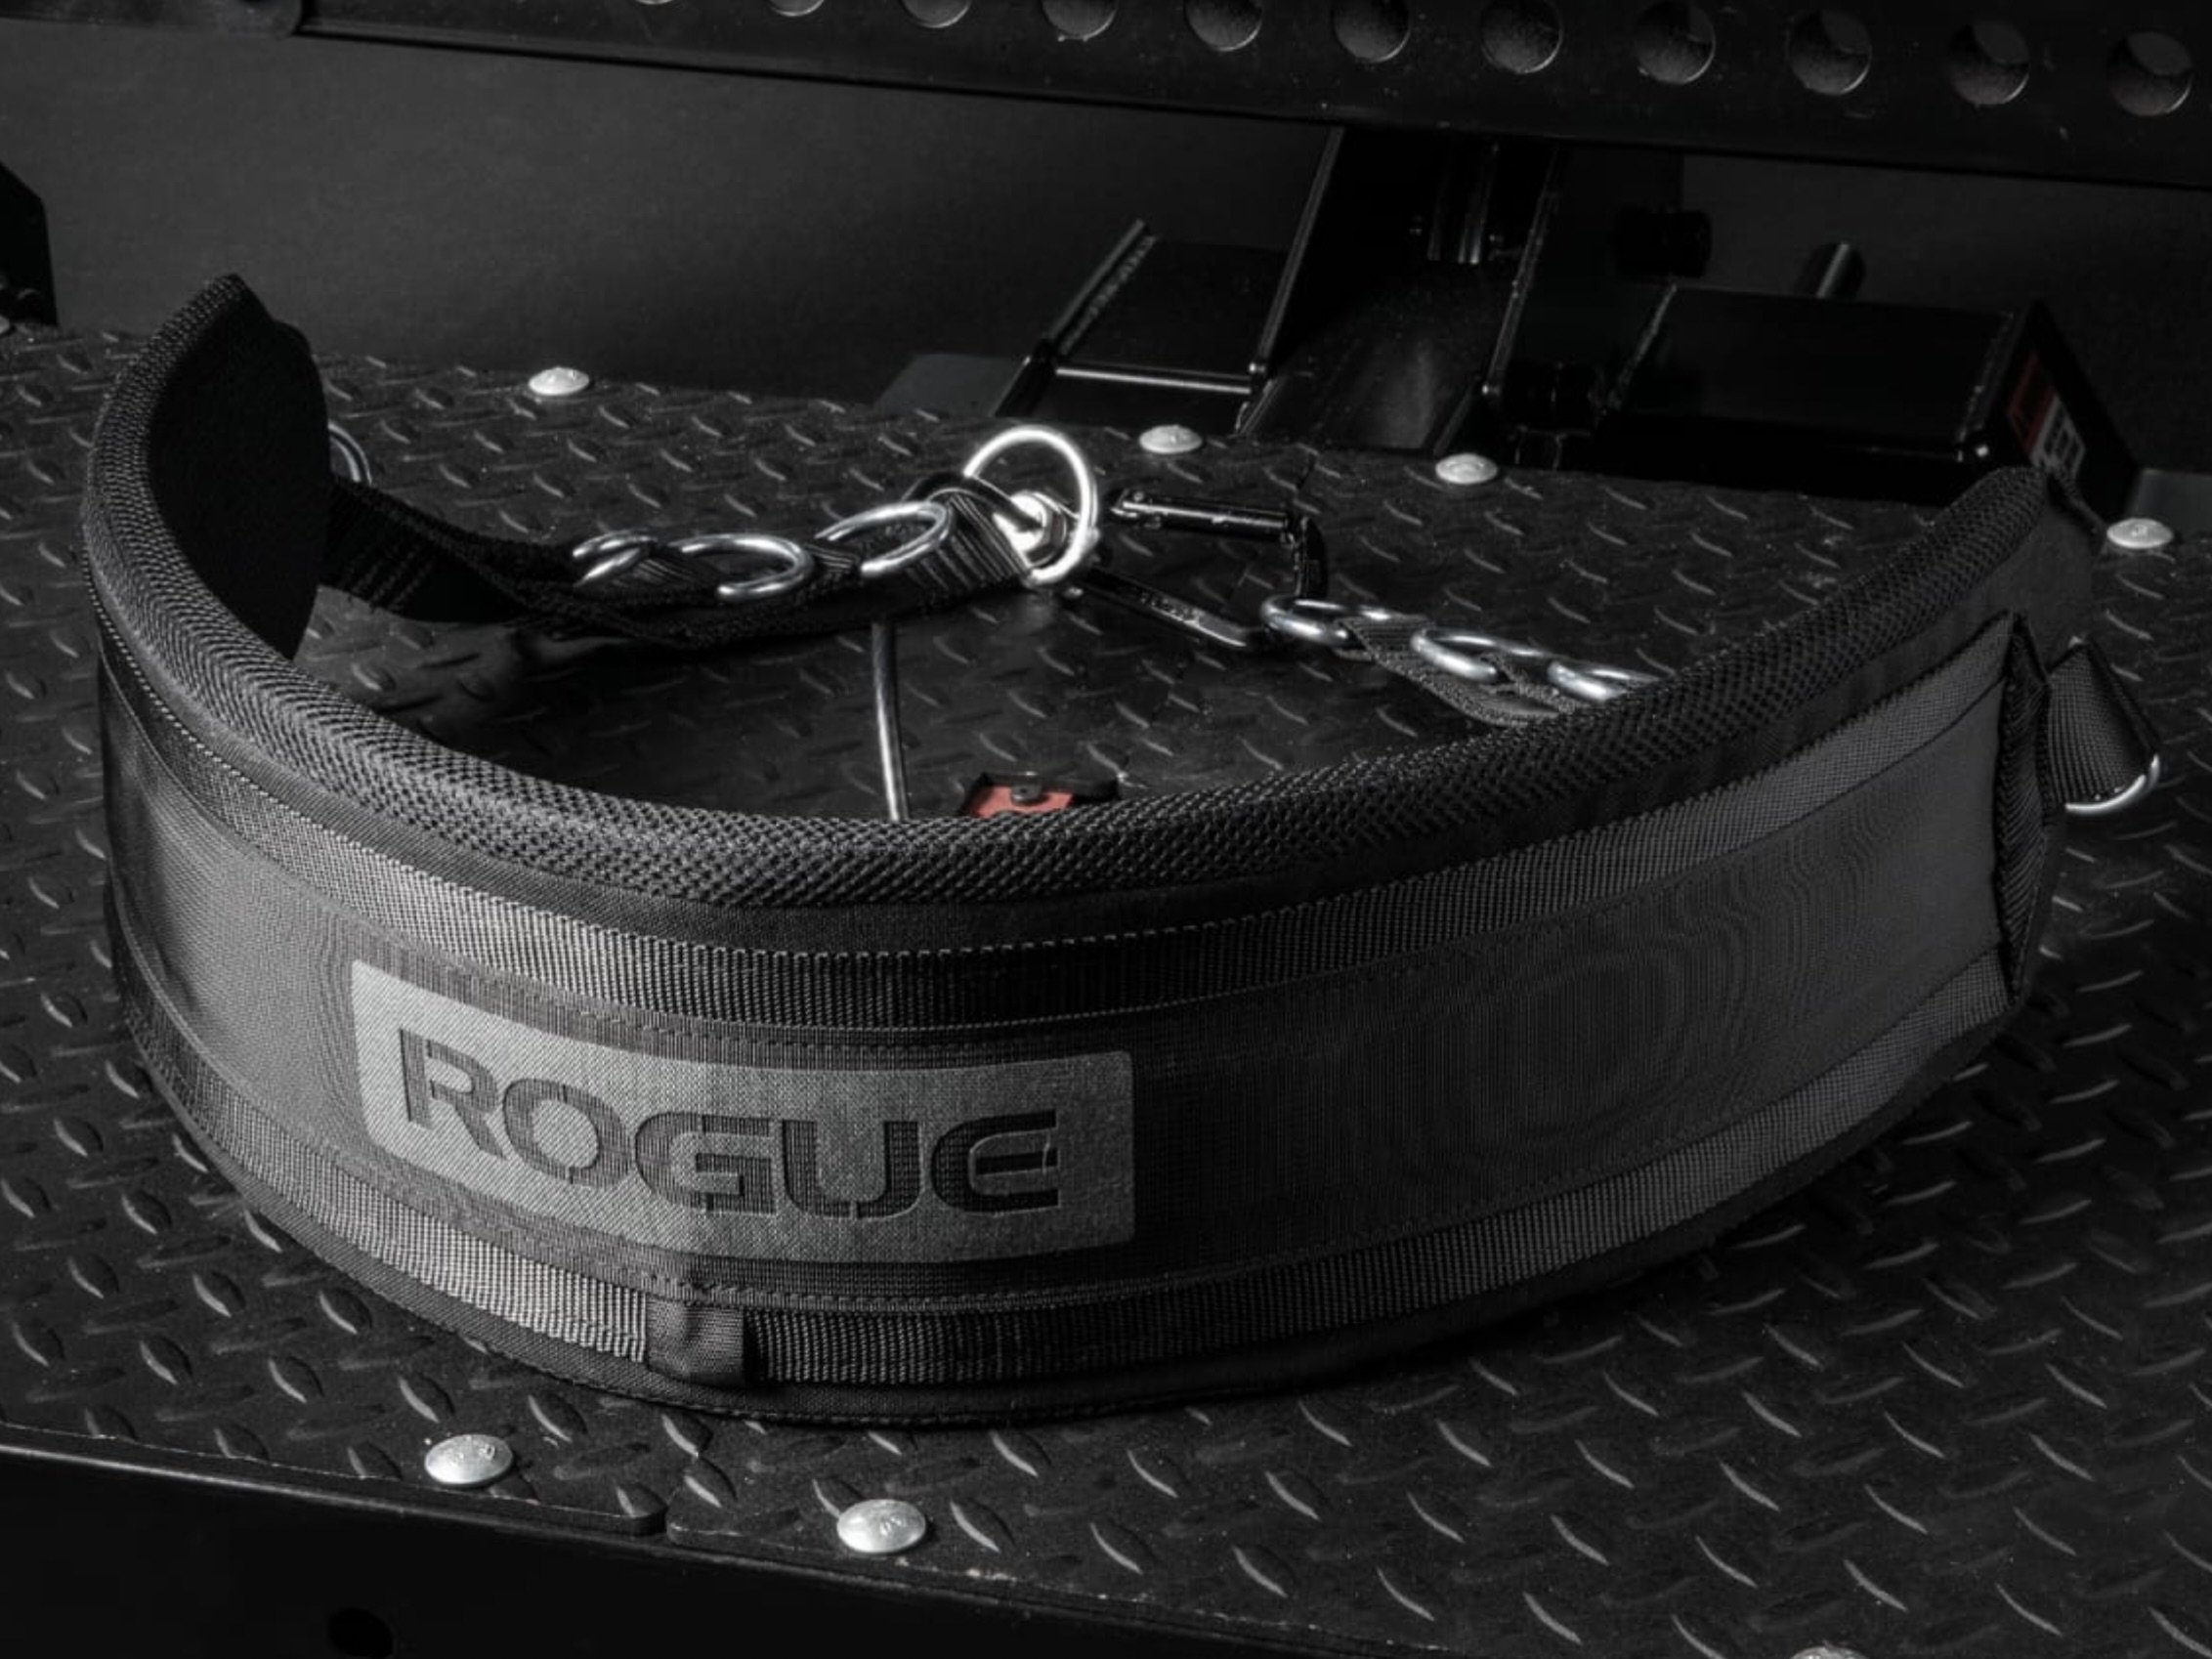
In order to perform belt squats, you’ll need a good squat belt. These are the two I recommend. I personally use the Spud Inc belt, the padding makes it very comfortable and the quality ensures that it will last a lifetime.


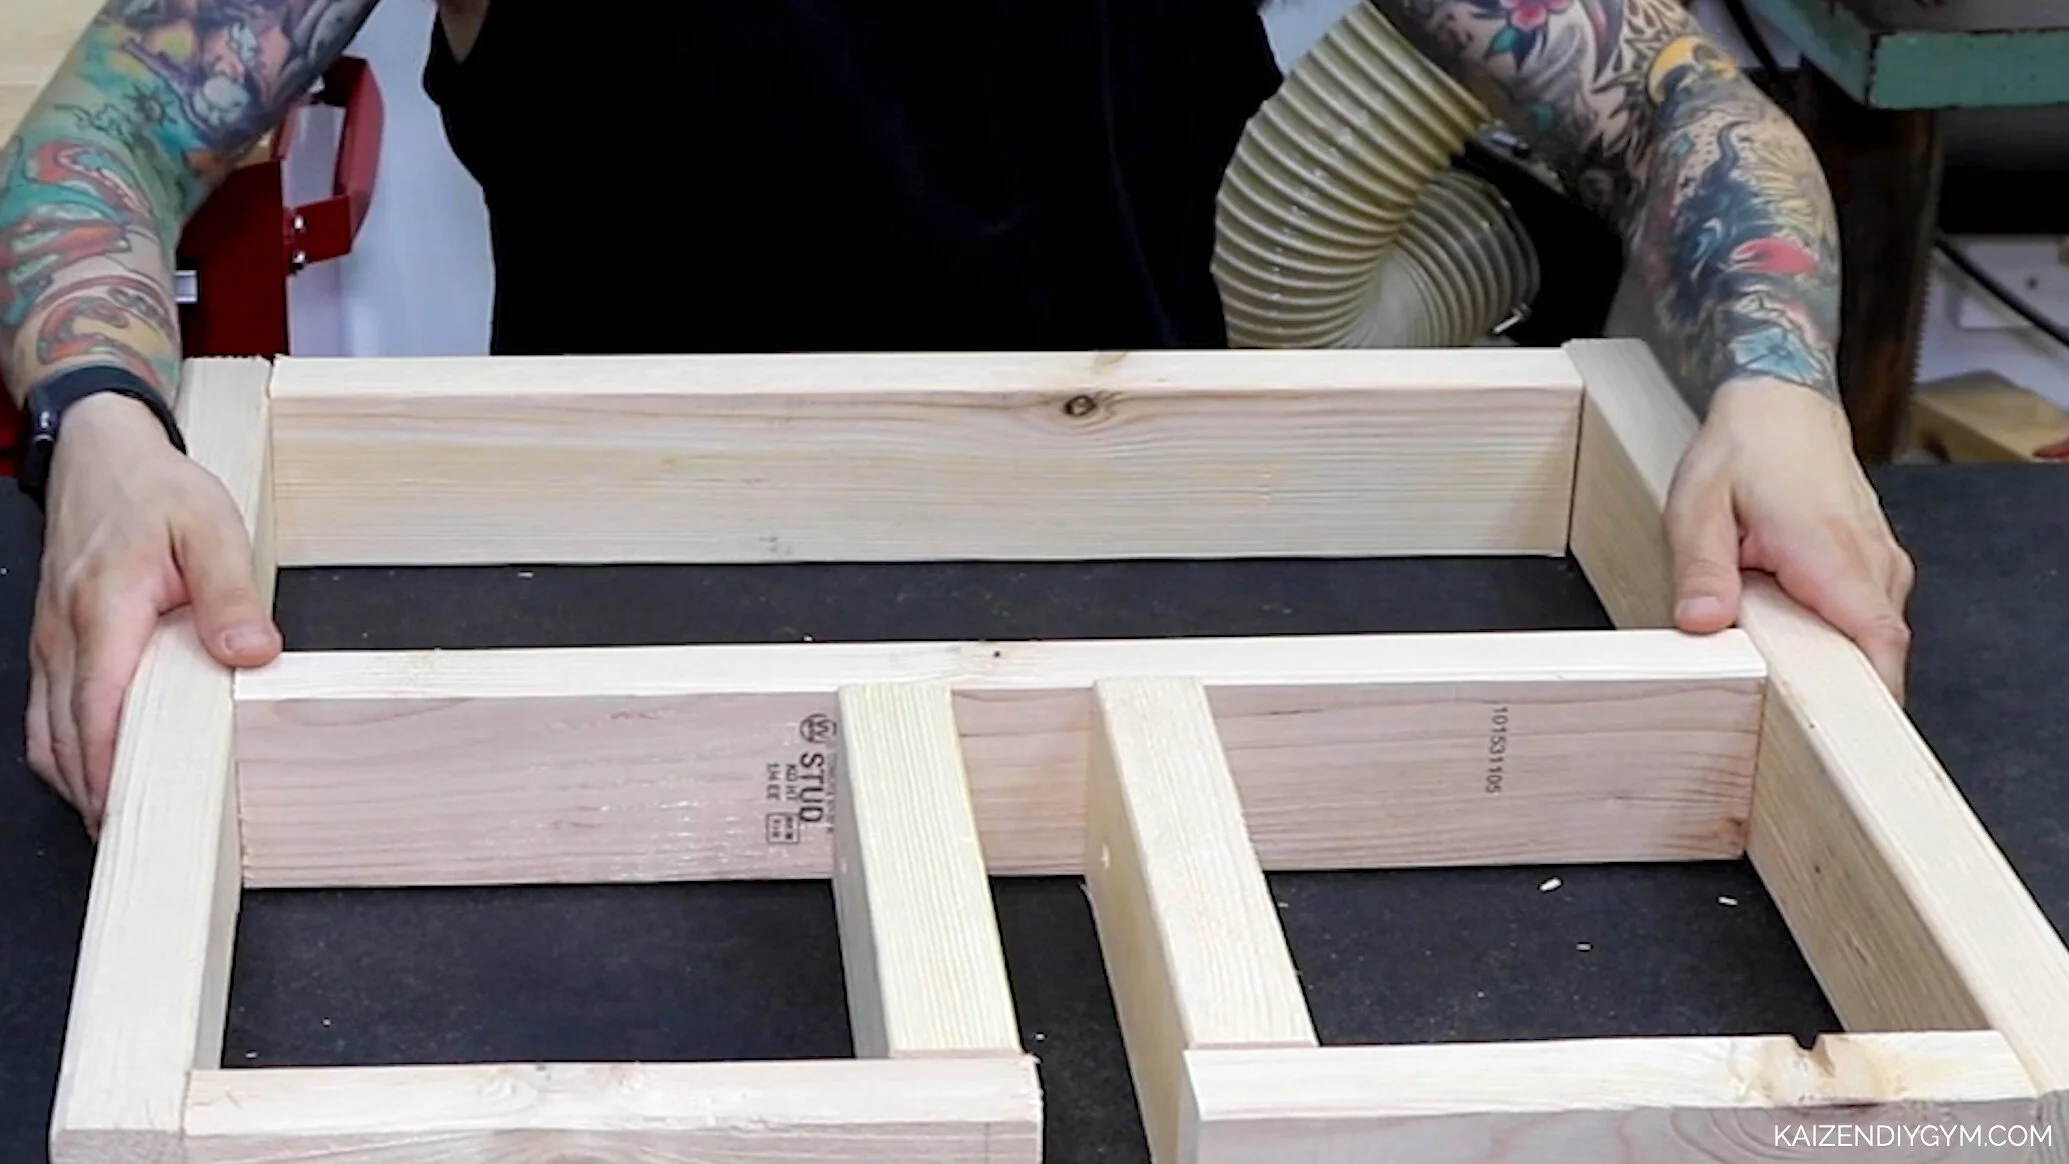
I start off by building the frame for platform. I use 2x4s in a simple configuration and fasten them together with screws.

I use a 5 and a half inch bolt, with washers and half inch spacers for my wheel.

The top of my platform is made from half inch plywood. My piece measures 24 inches by 24 inches. I use a one and a half inch forstner bit to make a hole.

then follow up with the mitre saw to cut the straight lines. You can also make this cut with a jigsaw if that’s easier.

I go over the top edges with my router and a round over bit, then start fastening it to the frame.

When I made the prototype, I had issues with it moving around when in use. The heavier the weight, the more it moved. I’ve got two solutions for this.

Option 1 - attach it to the power rack. These measurements are specific to my Ethos power rack, I suggest measuring for modifications if you have a different rack.

I put screws in the ends and two L brackets on each side. It might be a little much but it is better to be safe than sorry.


I attach this piece to the front side of the platform. The other 2x4s go in the middle and the back.

I use bolts to attach it to my rack, once they’re in it is solid as a rock.
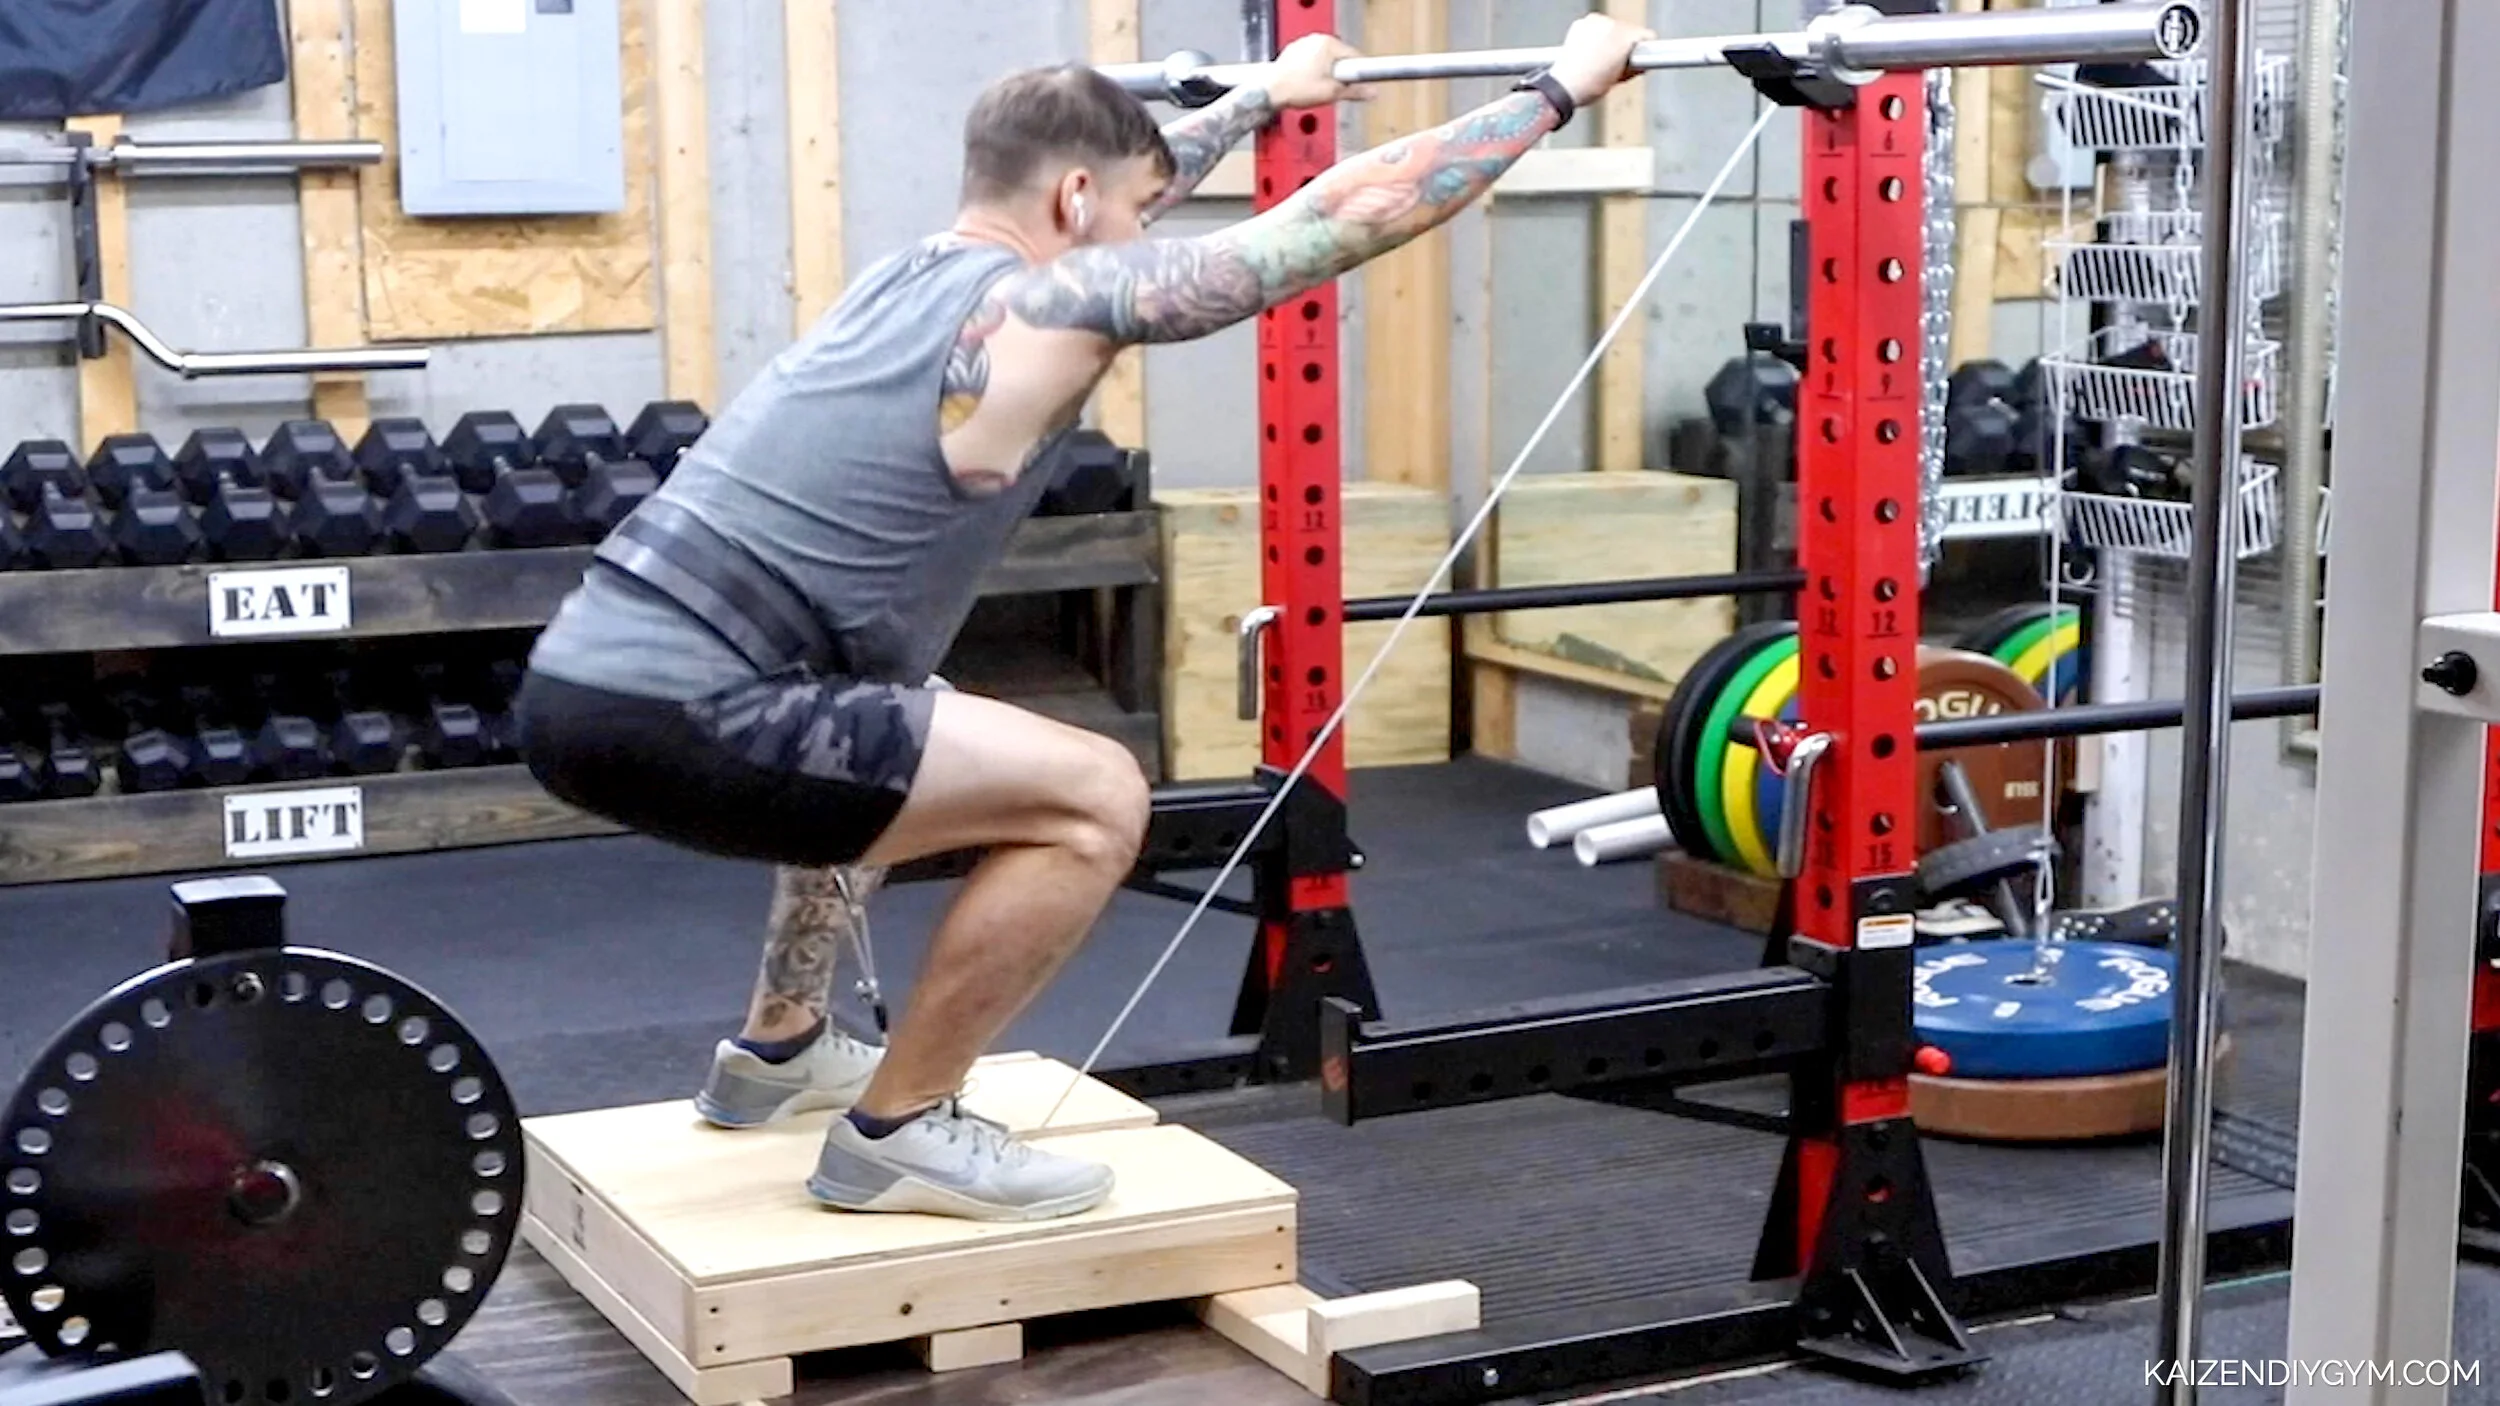
What I like about this one is being able to use a barbell to hold onto for stability.

Option 2 - add weight pins. Similar to the first option, on this one however the longer piece is 48 inches and has dowels.

I’m using inch and a half dowels, so I drill inch and a half holes all the way through with my drill press. This option has non-slip pads attached to the bottom, so I push the dowels through to roughly the same height as the pads before putting screws in to fasten.

Lastly, when attaching this piece, it goes in the middle. This keeps the weight evenly distributed.

I use large non-slip pads that screw in to the bottom. One on each corner.

I am attaching it to my functional trainer, so all I need is a small cable extension to connect. I put a couple bumpers on each side and this thing is not going anywhere.

Thanks for reading. Let me know what I should build next in the comment section below.