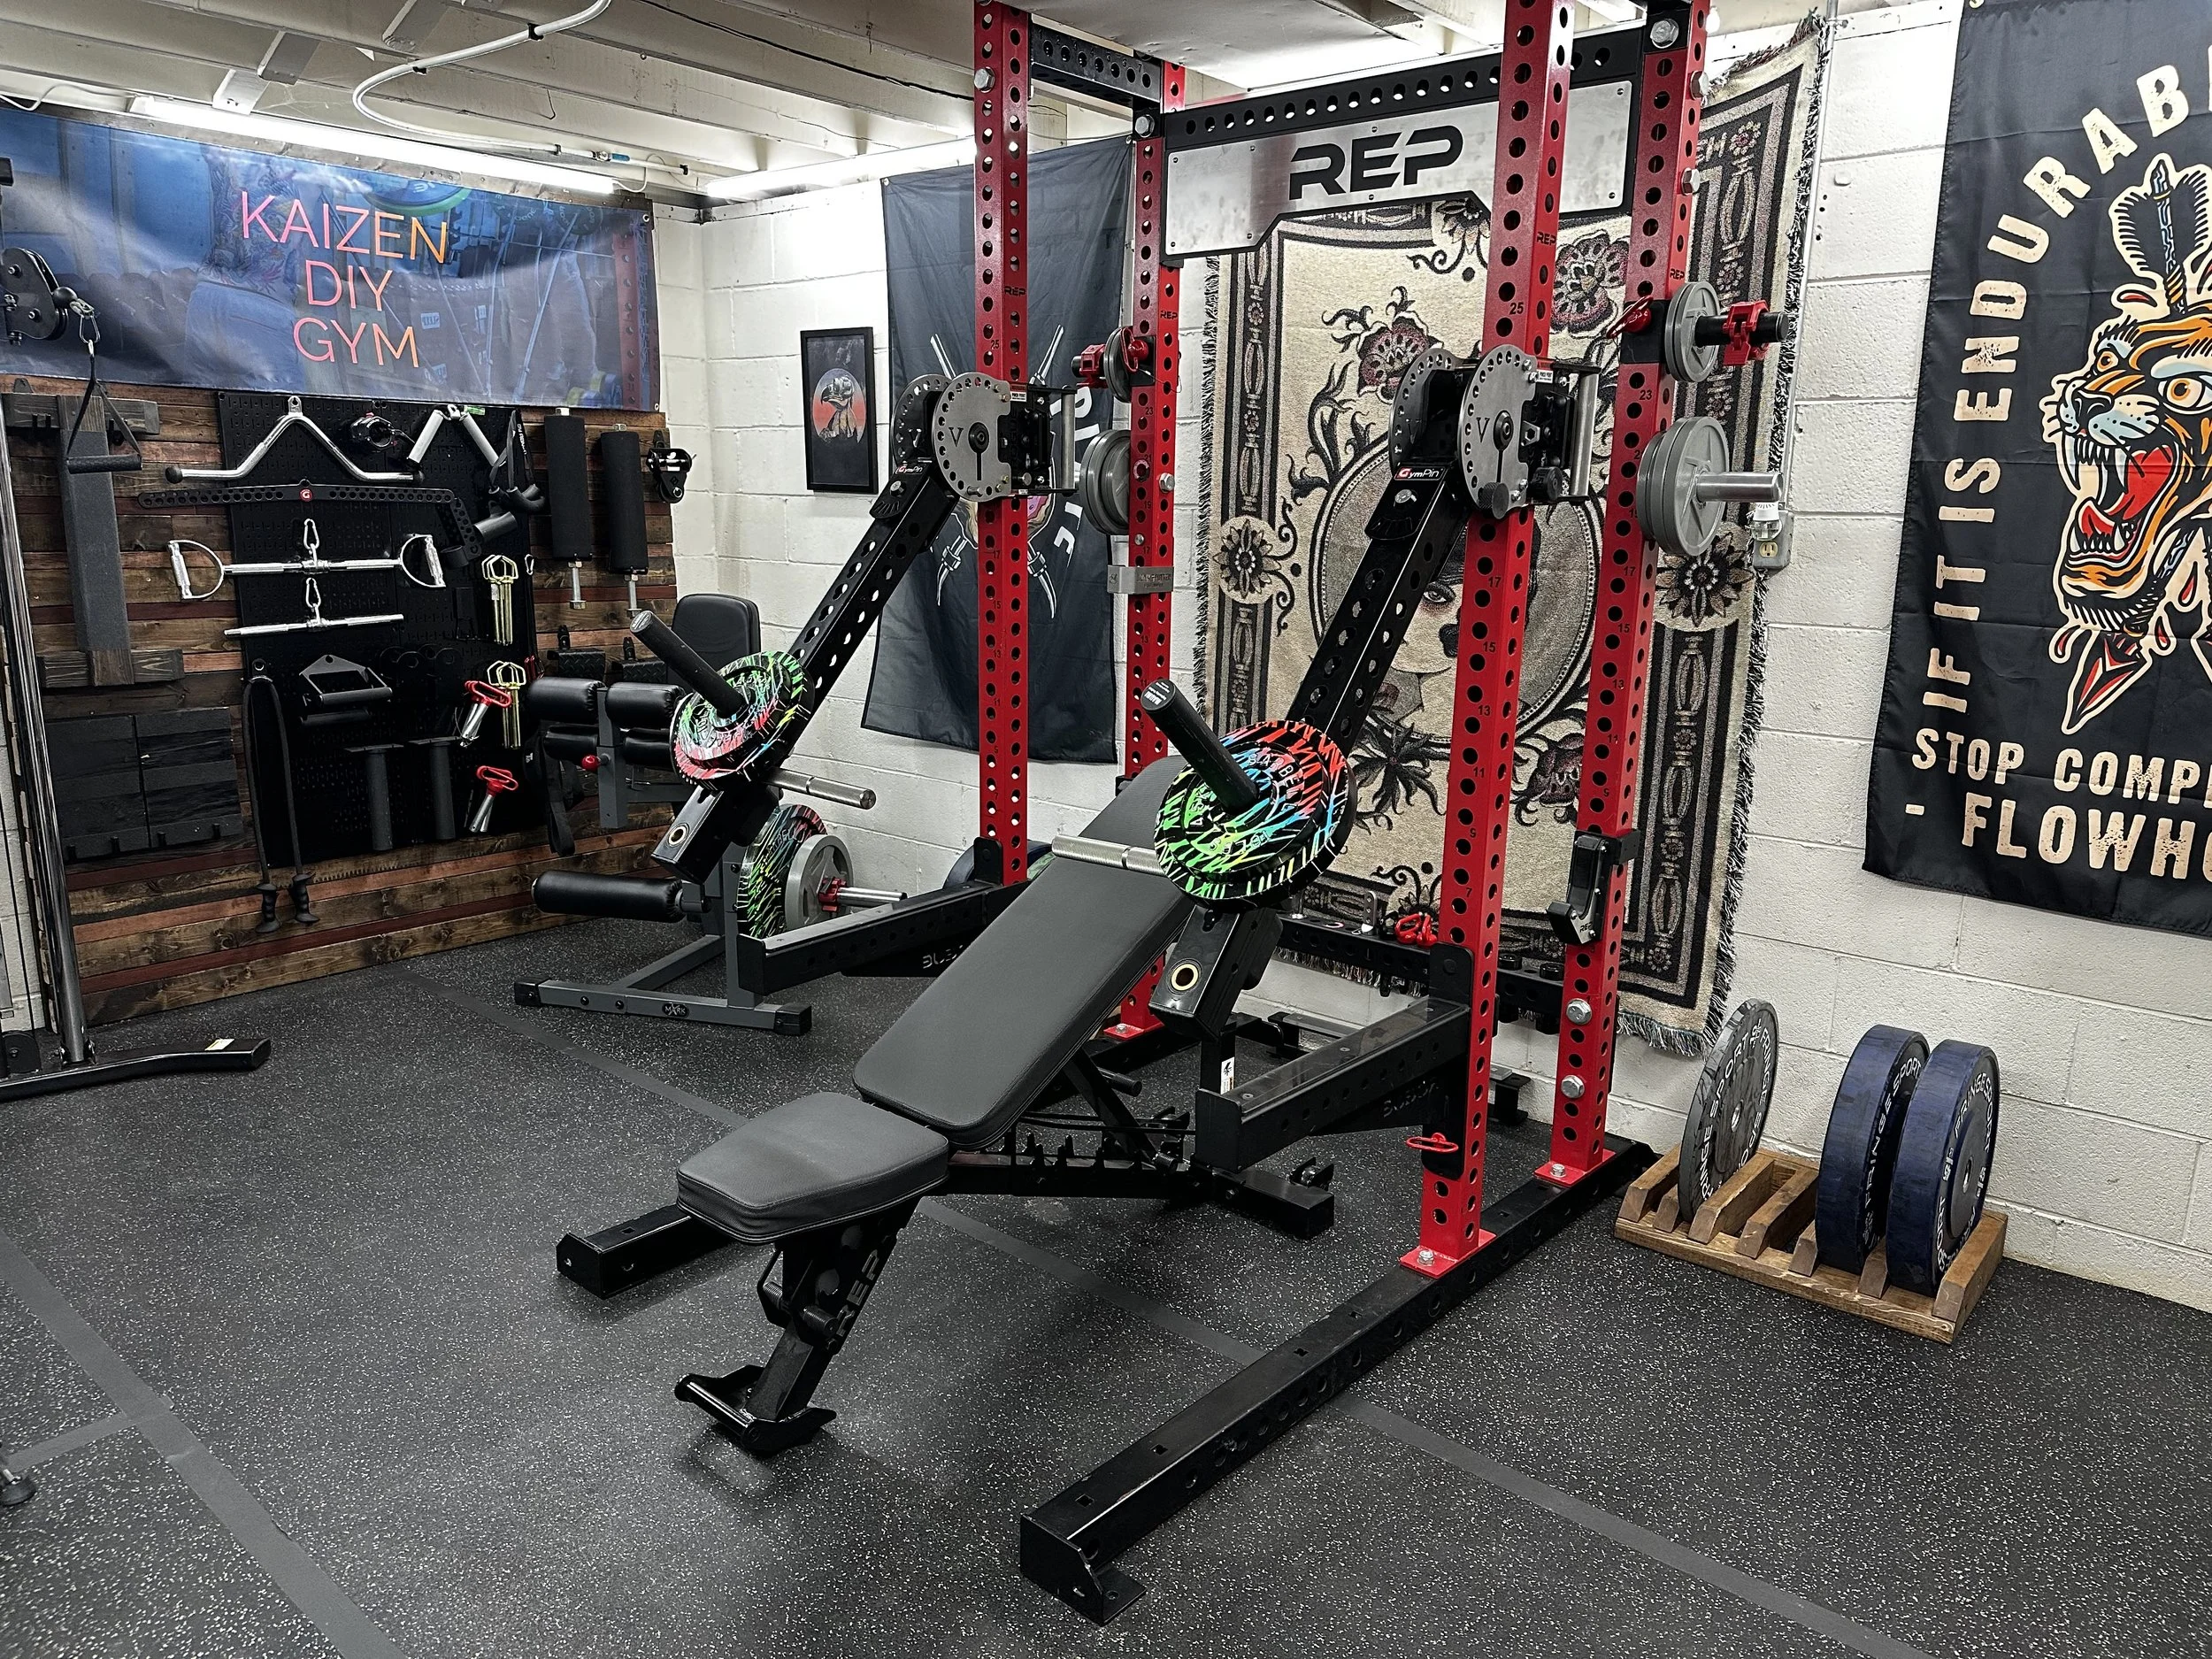
The Journey to the Ultimate Jammer Arm Setup
Jammer arms, or lever arms, have always been polarizing. Some love them, others hate them. Personally, I've always believed they hold untapped potential—especially for home gyms. But no one has truly perfected the design... until now.
In this post, I'll walk you through my journey with jammer arms, what went wrong with current models, and what I believe is the ultimate setup that can take your home gym to the next level.
The Early Days: My First Jammer Arms
When I first started building my home gym, I was intrigued by jammer arms. I saw amazing setups on the HomeGym subreddit and thought, I need those! I picked up the Fray arms from Garage Gym Experiment Jake, thinking they were the solution.
But I quickly realized they weren’t. The arms were heavy, difficult to move up and down the uprights, and only allowed for a single plane of motion—pretty boring. So, I got creative. I cut the arms down and added a second pivot point, opening up a whole new world of functionality. That was just the beginning of my jammer arm journey.
The DIY Evolution: Creating Better Functionality
After seeing my modifications, Gympin reached out and helped turn my DIY project into the Kaizen adapter. This adapter unlocked a whole new level of functionality for home gym enthusiasts. It was a huge improvement, but since we were retrofitting existing jammer arms, it wasn’t quite perfect.
Around the same time, Britton added adapters to the sides of the jammer arm trolley to give them a fixed starting point. This modification, combined with our Kaizen adapter, transformed the single-plane jammer arms into more versatile tools, closely mimicking movements found on commercial gym machines. But again, it wasn’t perfect—we were still constrained by original designs not meant for these upgrades.
The State of the Industry: The Good, The Bad, and The Ugly
In the past few years, some companies have released fully articulating jammer arms, trying to improve on the original designs. Griffin and Crandall Fitness were among the first to attempt this. But there’s a major flaw I noticed early on: side-mounted weights.
Side-mounting weights on articulating jammer arms pushes the arms inward and can cause them to hit the rack uprights during certain movements. That’s why I switched to front-mounted weight horns for my own DIY jammer arms.
So far, Straydog Strength is the only company to get this right by copying my front-mounted design. Straydog’s arms are fully articulating, but unfortunately, they don’t lock into multiple starting points. Close, but still not perfect.
Coop recently reviewed Griffin’s jammer arms, and while they're decent, they missed a few key features. Again, close but not quite there. And Crandall’s arms? They offer solid value for the price, but they're not perfect either.
Then we have the PRx Halo Arms. While they’re high-quality, made in America, and feature multiple starting positions, they still use side-mounted weight horns, which is a downside. Plus, the price is a bit steep.
The Perfect Jammer Arm Setup: My Vision
Now, let me show you what I believe is the ultimate jammer arm setup. You can’t buy it yet, but I’ve pieced it together using my Rogue 2.0s.
1. Trolley System
A smooth trolley system is essential for easy adjustment of the heavy jammer arms. Rogue’s system is top-notch, but there’s speculation that a patent is involved, which is why others haven’t adopted it.
2. Vendetta Plates
I use Vendetta Strength and Athletics’ plates to lock the arms into various starting positions and even keep them locked in an upward position when not in use. This is a game-changer.
3. GymPin Kaizen Adapters
These adapters allow full side-to-side articulation and can lock into different positions along the arm. This adds versatility unmatched by any other home gym equipment.
4. Separate Weight Horns and Handles
I use separate weight horns that fit any 1-inch hole along the arm and mount them on the front. I also add Abmat Plate Spacers for a better resistance profile. For handles, I use Mutant Metals’ beautifully knurled 12-inch handles, which can be placed wherever I want for maximum leverage control. This setup gives me complete customization over my jammer arms.
The Next Level: New Handle Options
Recently, two new handles have emerged that take things to the next level:
Megalith Handles from Rorman Strength: These feature smooth articulation with bearings that make every movement feel more natural.
Taco Handles from Gympin: These adjustable-angle handles add incredible versatility for different exercises, though they could benefit from a bit more length and some knurling. Gympin is already working on an update.
The Future: A Perfect Jammer Arm
This setup is the ultimate in versatility, but it's still a DIY project. If you’re wondering when you’ll be able to buy a similar setup straight out of the box, stay tuned! Gympin and I have been working on a design, and we might have found a partner in the US to bring it to life with full-scale manufacturing.
If you want to be the first to know when the perfect jammer arm hits the market, make sure to subscribe and follow along. In the meantime, you can check out all the products I’ve used to create this setup.
Products Featured in This Post
Rogue 2.0 Trolley Arms: Buy here
Vendetta Strength and Athletics Adapters: Check them out
GymPin Kaizen Adapters: Get yours here (Use code KAIZEN10 for 10% off)
Mutant Metals Handles: Shop now
Maumi Weight Horns: Order here
Rorman Strength Megalith Handles: Available here
GymPin Taco Handles: Find them here (Use code KAIZEN10 for 10% off)
AbMat Plate Spacers: Buy here (Use code KAIZEN10 for 10% off)
Other Jammer Arms Mentioned
PRx Halo Arms: Learn more
Crandall Fitness Swing Arms: Check them out
Griffin Fitness Adjustable Lever Arms: Shop here
Stay tuned for more updates and thank you for reading!

