
Dumbbell rack for 10-50 pound set of rubber hexagon dumbbells V.3
DIY Dumbbell Rack: Simple Tutorial for Your Home Gym
Most people look at a project like building a DIY dumbbell rack and assume it is way too difficult. Well, if I can do it, so can you. In this tutorial, I’ll show you how to create your very own dumbbell rack to keep your home gym organized and functional.

Why Build Your Own DIY Dumbbell Rack?
Creating a DIY dumbbell rack has several benefits:
- Cost-Effective: Save money by building your own instead of purchasing a pre-made rack.
- Customizable: Tailor the size and design to fit your specific gym space and equipment.
- Satisfaction: Enjoy the pride of building something functional and sturdy with your own hands.
DIY Dumbbell Rack for Home Gym: My Perfect Build
Lately, just for fun, I’ve been making things for my home gym - deadlift platform, weight tree, wall mounted weight storage and my favorite project - my DIY dumbbell rack. I’ve actually built and rebuilt this thing a couple of times. There were some small design flaws in the previous versions, so I’ve taken what I learned from those and made the perfect DIY dumbbell rack!
Why I Built This DIY Dumbbell Rack
Since 10-50 is the most common dumbbell set, I’ve measured out enough space for a set of that size. You can make your DIY dumbbell rack bigger or smaller depending on your needs.
Time to Build and Complexity of the DIY Dumbbell Rack
This DIY dumbbell rack took me about 5 hours to build, spread out over a weekend. It’s not very complicated, it just takes time to do everything right.
Alternative Options to the DIY Dumbbell Rack
If you don’t feel like building one, here are some excellent alternatives:
- Fringe Sport has standalone and rack-mounted dumbbell racks.
- Bells of Steel offers a deep discount for local pickup on their dumbbell racks.
- REP Fitness offers high-quality dumbbell racks.
- PRx Performance sells space-saving wall-mounted dumbbell racks.
- Rogue Fitness offers American-made dumbbell racks.
Previous Versions of the DIY Dumbbell Rack
This is the 3rd version of this DIY dumbbell rack. For the previous version, click here.
Materials used:
7 - 6ft long 2x4’s
2 - 6ft long 1x6’s
4 - 6ft long 1x8’s
1/8” thick birch wood or vinyl
White spray paint
Tools used:
Bosch cordless drill/driver set
Glowforge laser cutter or Cricut vinyl cutter
*This post is not sponsored. Some of the links are affiliates which means if you purchase through the link, I’ll receive a small commission.

First step: I cut my 2x4’s into four 30 inch pieces. Then I cut four 13.5 inch pieces with 70º angles. These will assemble to be the sides of the rack.

I measure down 6 inches and then mark my 70º angle. This is where I attach my first 13.5 inch shelf support piece.

I don’t need to mark anything else before fastening everything together. The lower shelf support piece basically sits on the ground.

When they’re done, they should look like mirror images of each other.

Then I cut a couple of 2x4’s to 60 inches, this is my width. If you want to go much wider than this, I suggest putting an additional support in the middle (v2 rack build)
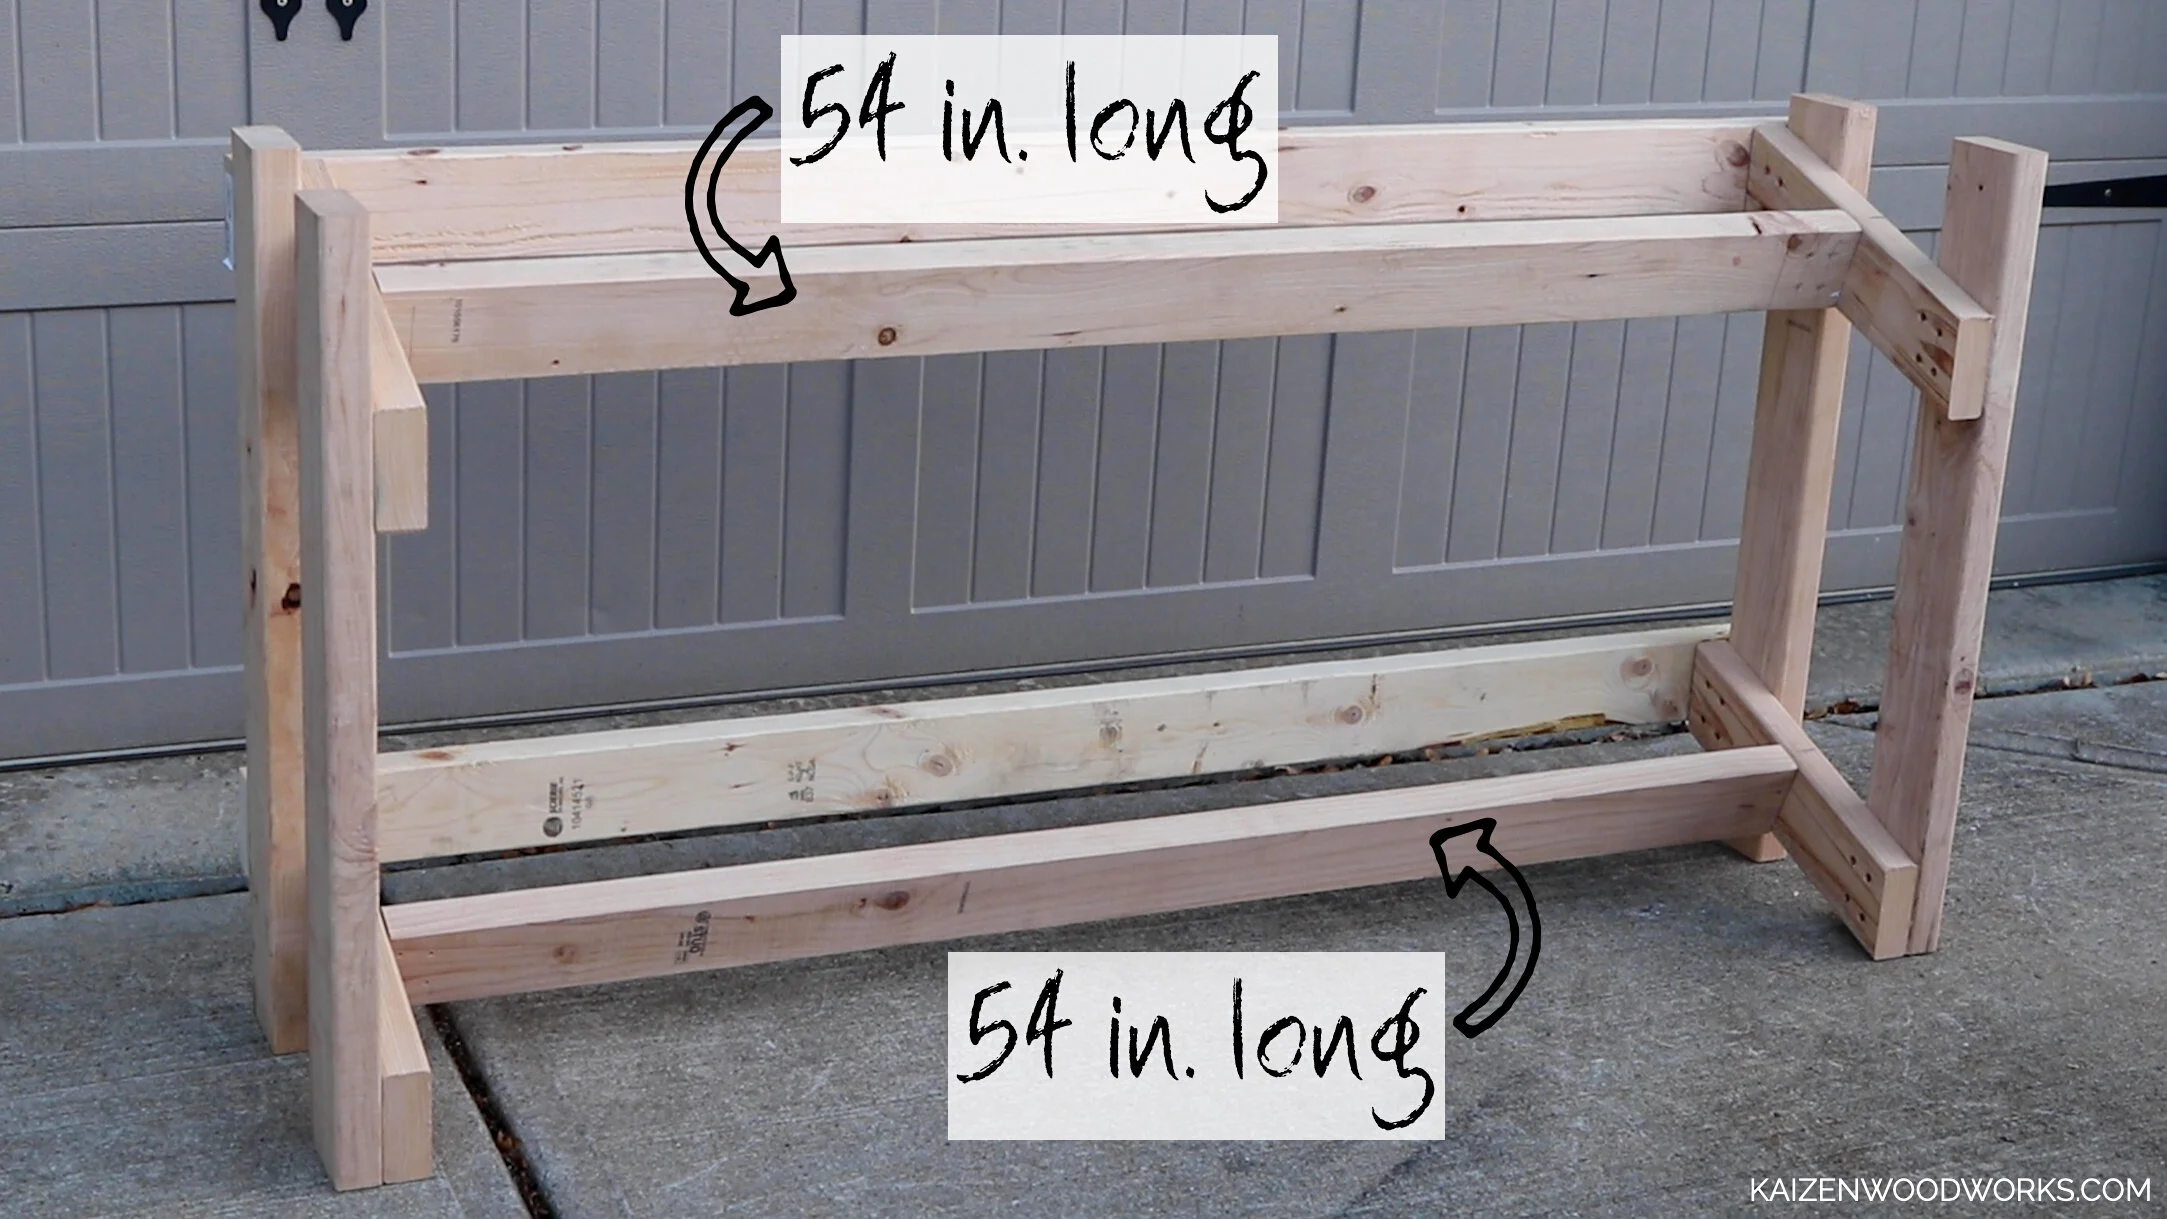
Next, I cut a couple more 2x4’s to 54”, these are the supports that the 1x8s will both be resting on. They’ll go roughly in the center of the shelf support pieces, but don’t fasten them just yet.


It is time to prep my 1x6s. These are the most visible pieces on the rack, so I made sure to pick out really nice looking pieces. I cut them to 60”, hit them with the table router, and sand them.


For the 1x8s, I cut them to 57 inches, drill pocket holes for the front two, and sand the markings off.

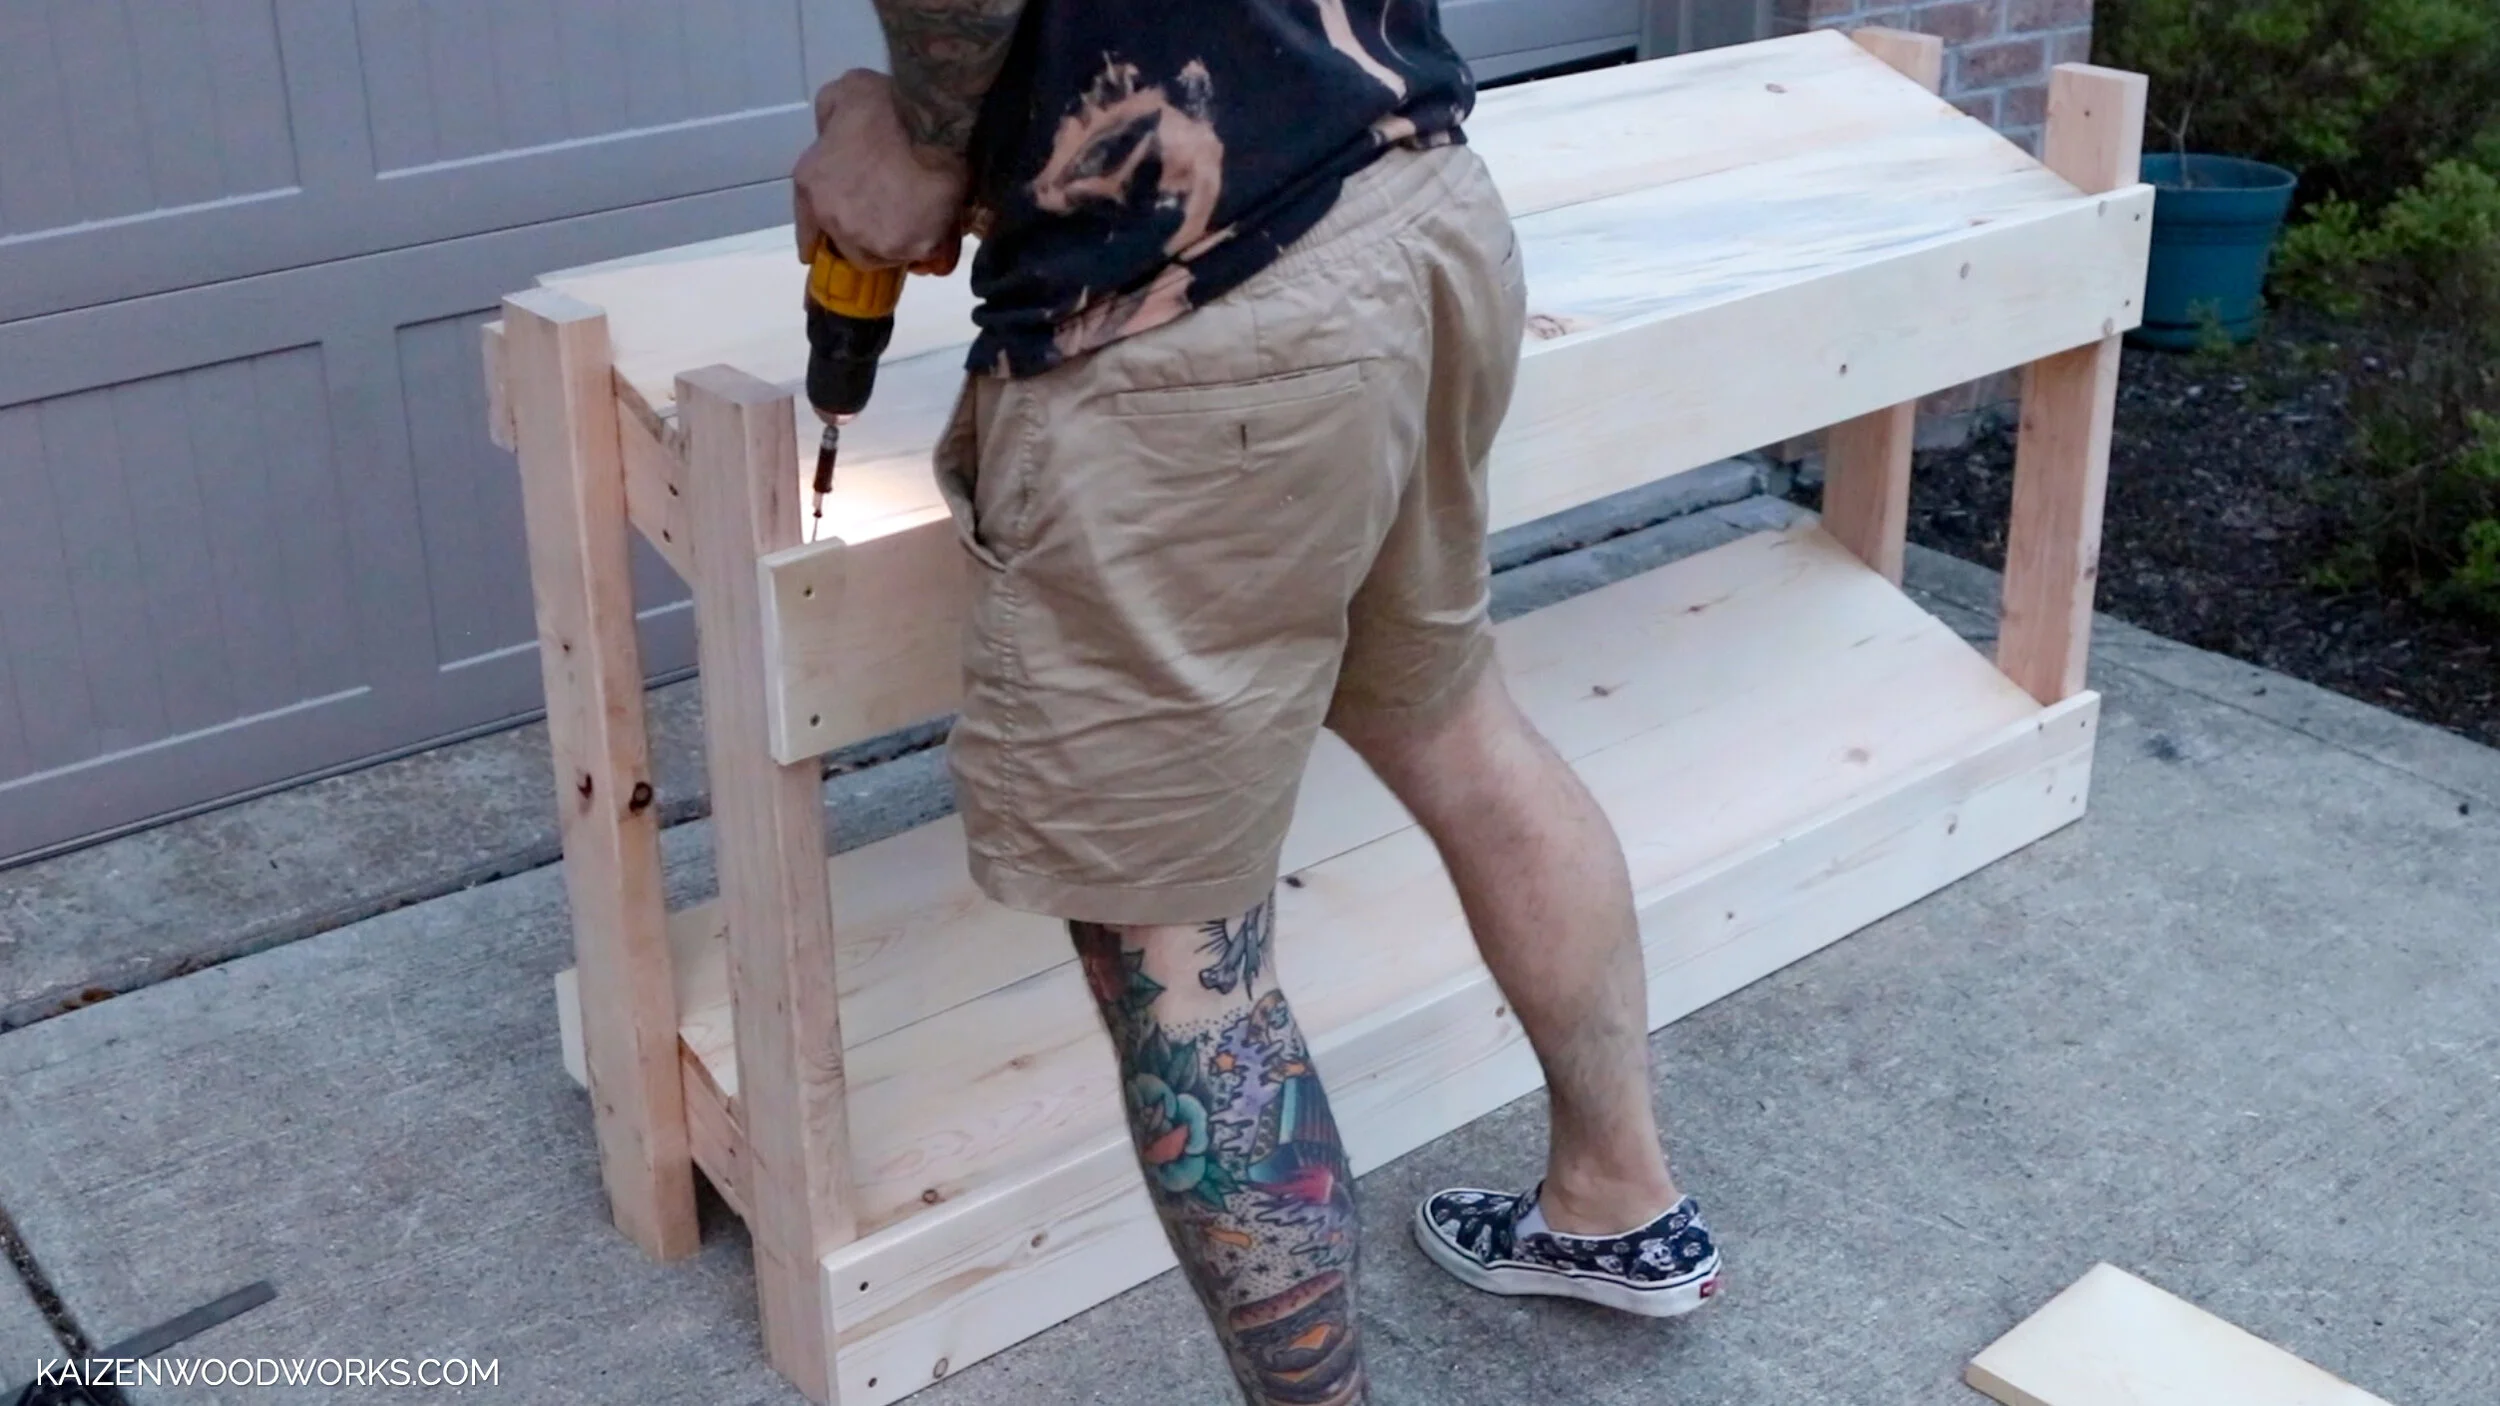
The 1x6s attach to the front, bottom of the 1x6 should be flush with the bottom of the 13.5 inch shelf support piece.

At this point I realize that the 2x4s that go under the 1x8s are about 1/2” off.

I go back and remove the 2x4s, and while they’re off I take the opportunity to put the pocket screws into the front 1x8 shelf pieces.


Once those are in place, I put the 2x4 back and just eyeball where it should go. You basically want to make sure it supports both 1x8s that are sitting on top of it.
Once these are back in, I am ready to fasten the 1x8s

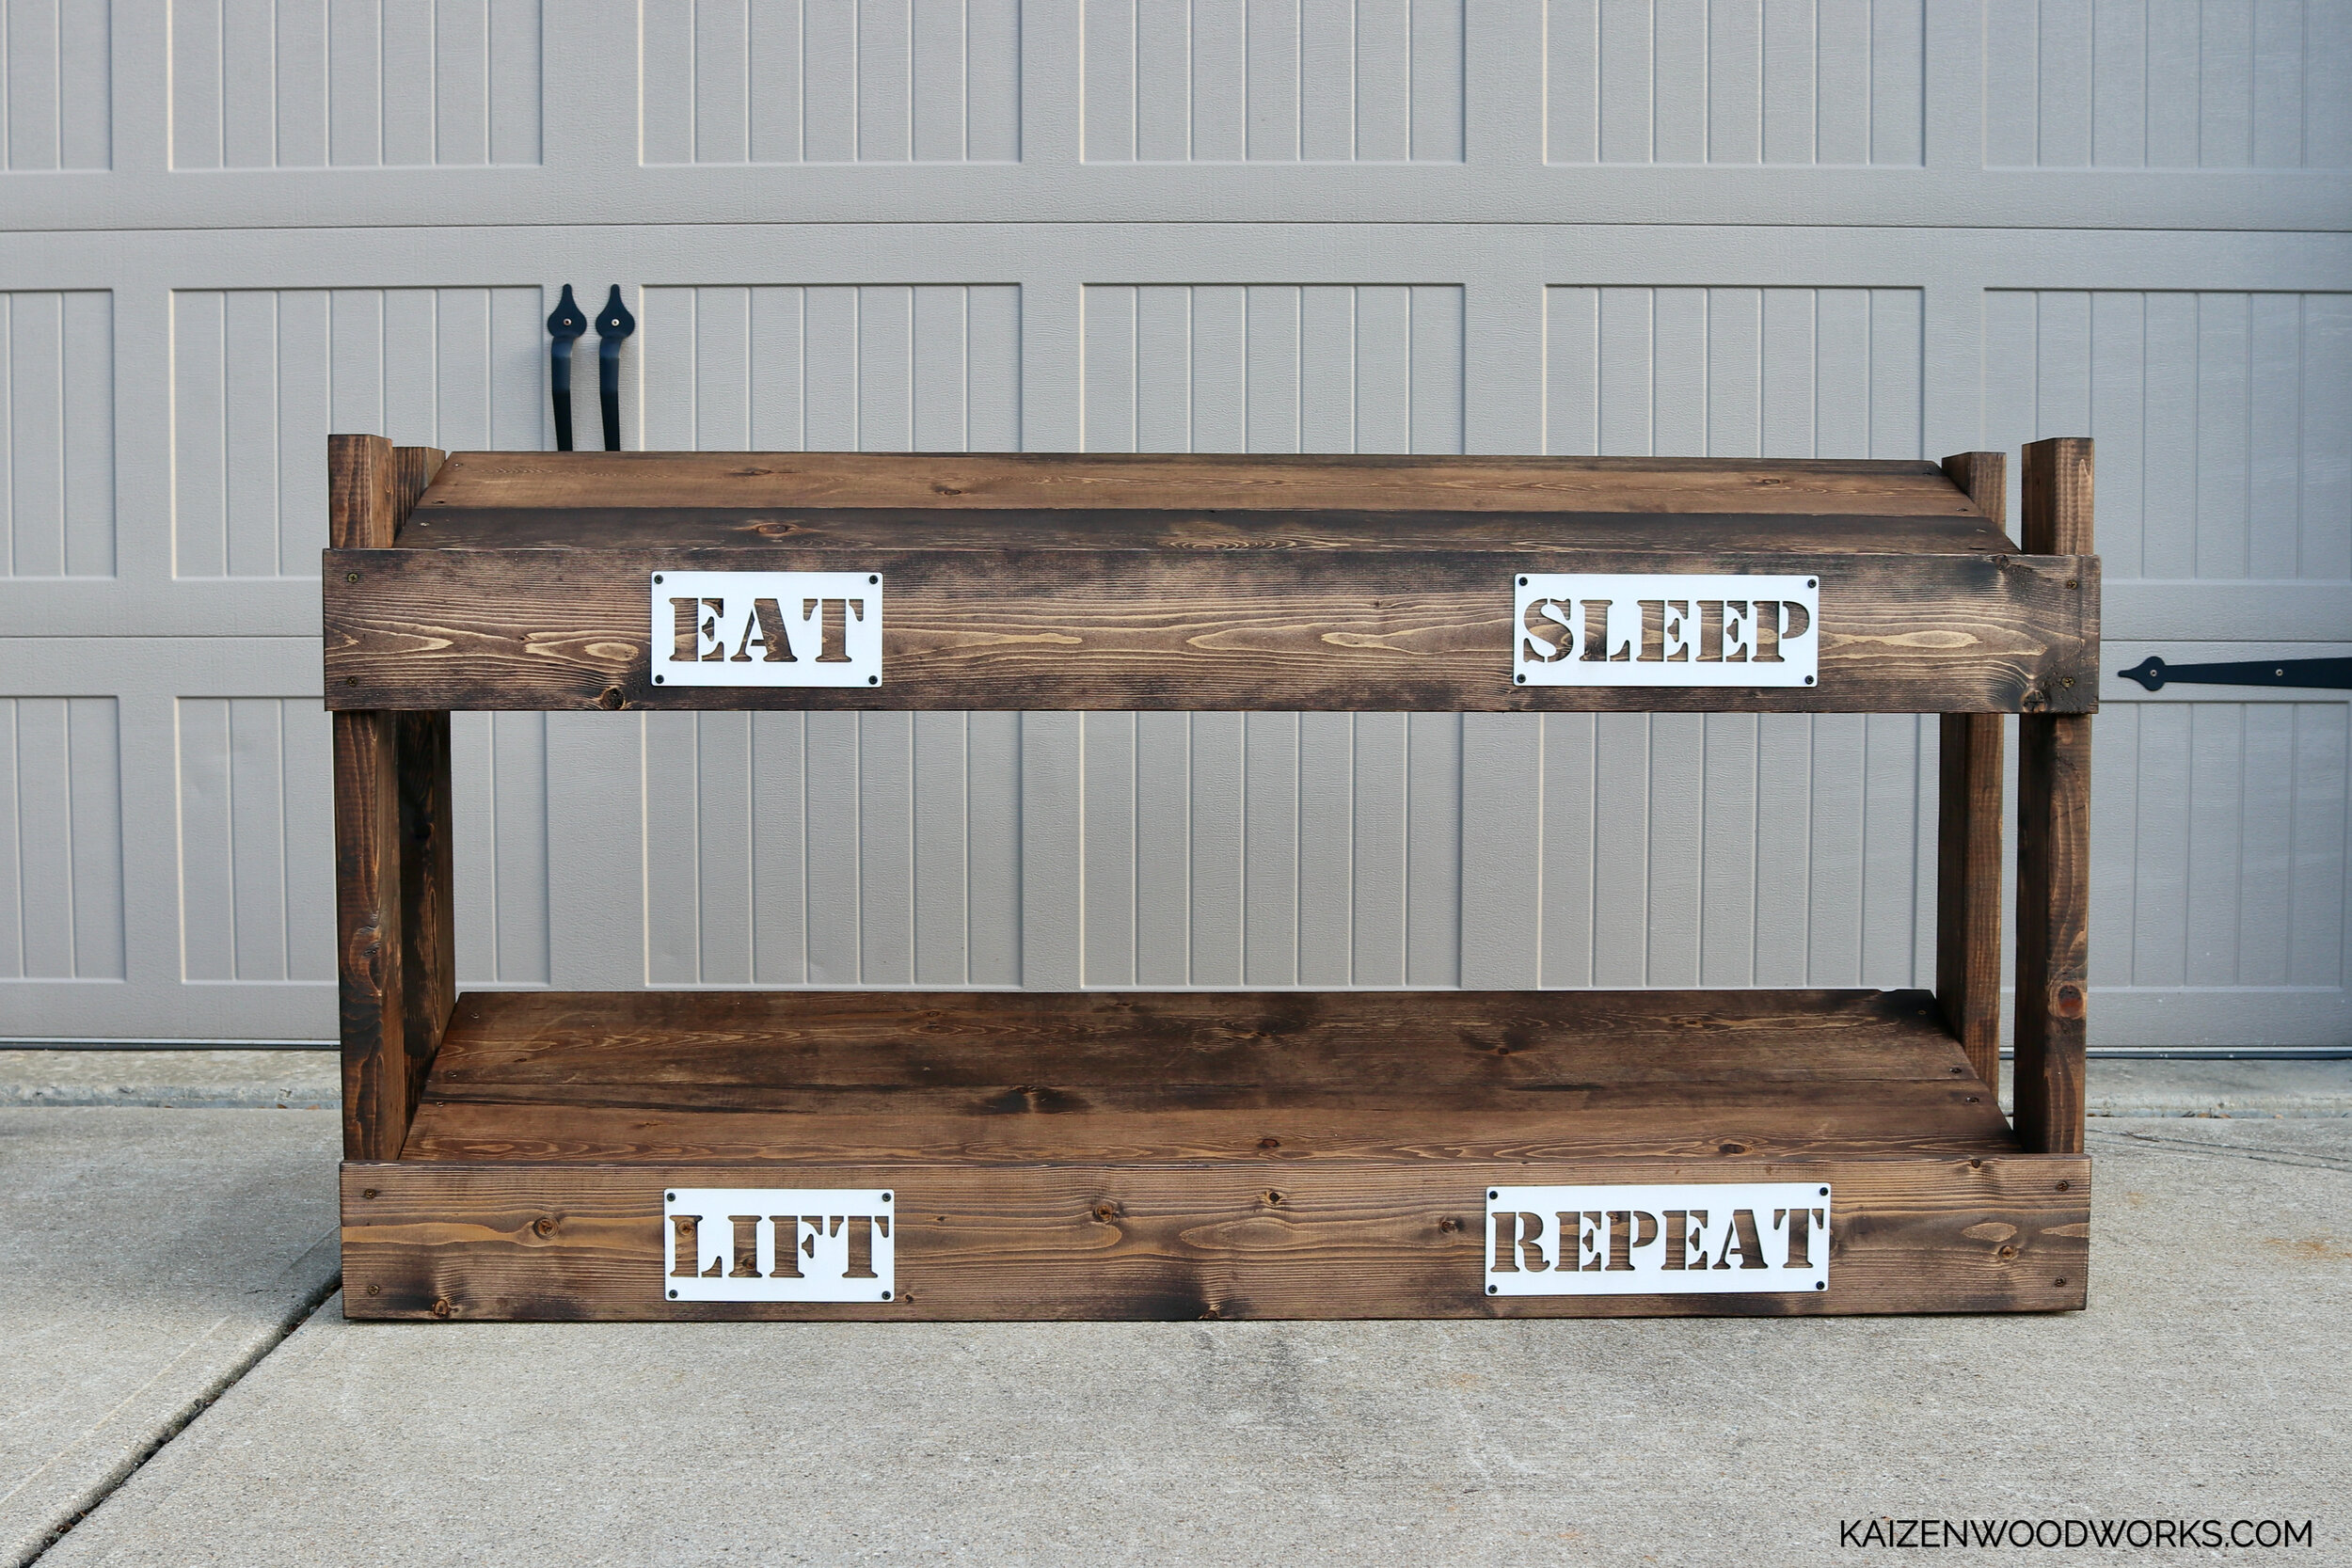
For this one, I am using espresso wood stain. It is a nice dark rich brown color and really brings out the wood grain. I flip it over to get the anything visible on the underside. I’m only worried about staining the areas that might be visible, I don’t need to stain everything. I let the stain dry for 24 hours

While that dries, I fire up my Glowforge and start cutting some birch wood. If you’d like to do this, the digital cut files are available for free download. I use 1/8” Baltic Birch, but it could just as easily be done with vinyl on a Cricut or even spray paint and stencils.
Once the words are cut out, I spray paint them white to provide a contrast with the espresso wood stain.

Once these are cut, I spray paint them white.

I attach these real quick and we are officially done.
If you need dumbbells to go with the rack you’re building, check out what these brands have in stock:
- Rogue Fitness - High-quality American-made dumbbells and racks.
- Titan Fitness - Affordable options for home gym equipment.
- Fringe Sport - Premium dumbbells and storage solutions.
- Bells of Steel - Excellent value with local pickup discounts.
- REP Fitness - Durable and versatile dumbbells for any setup.
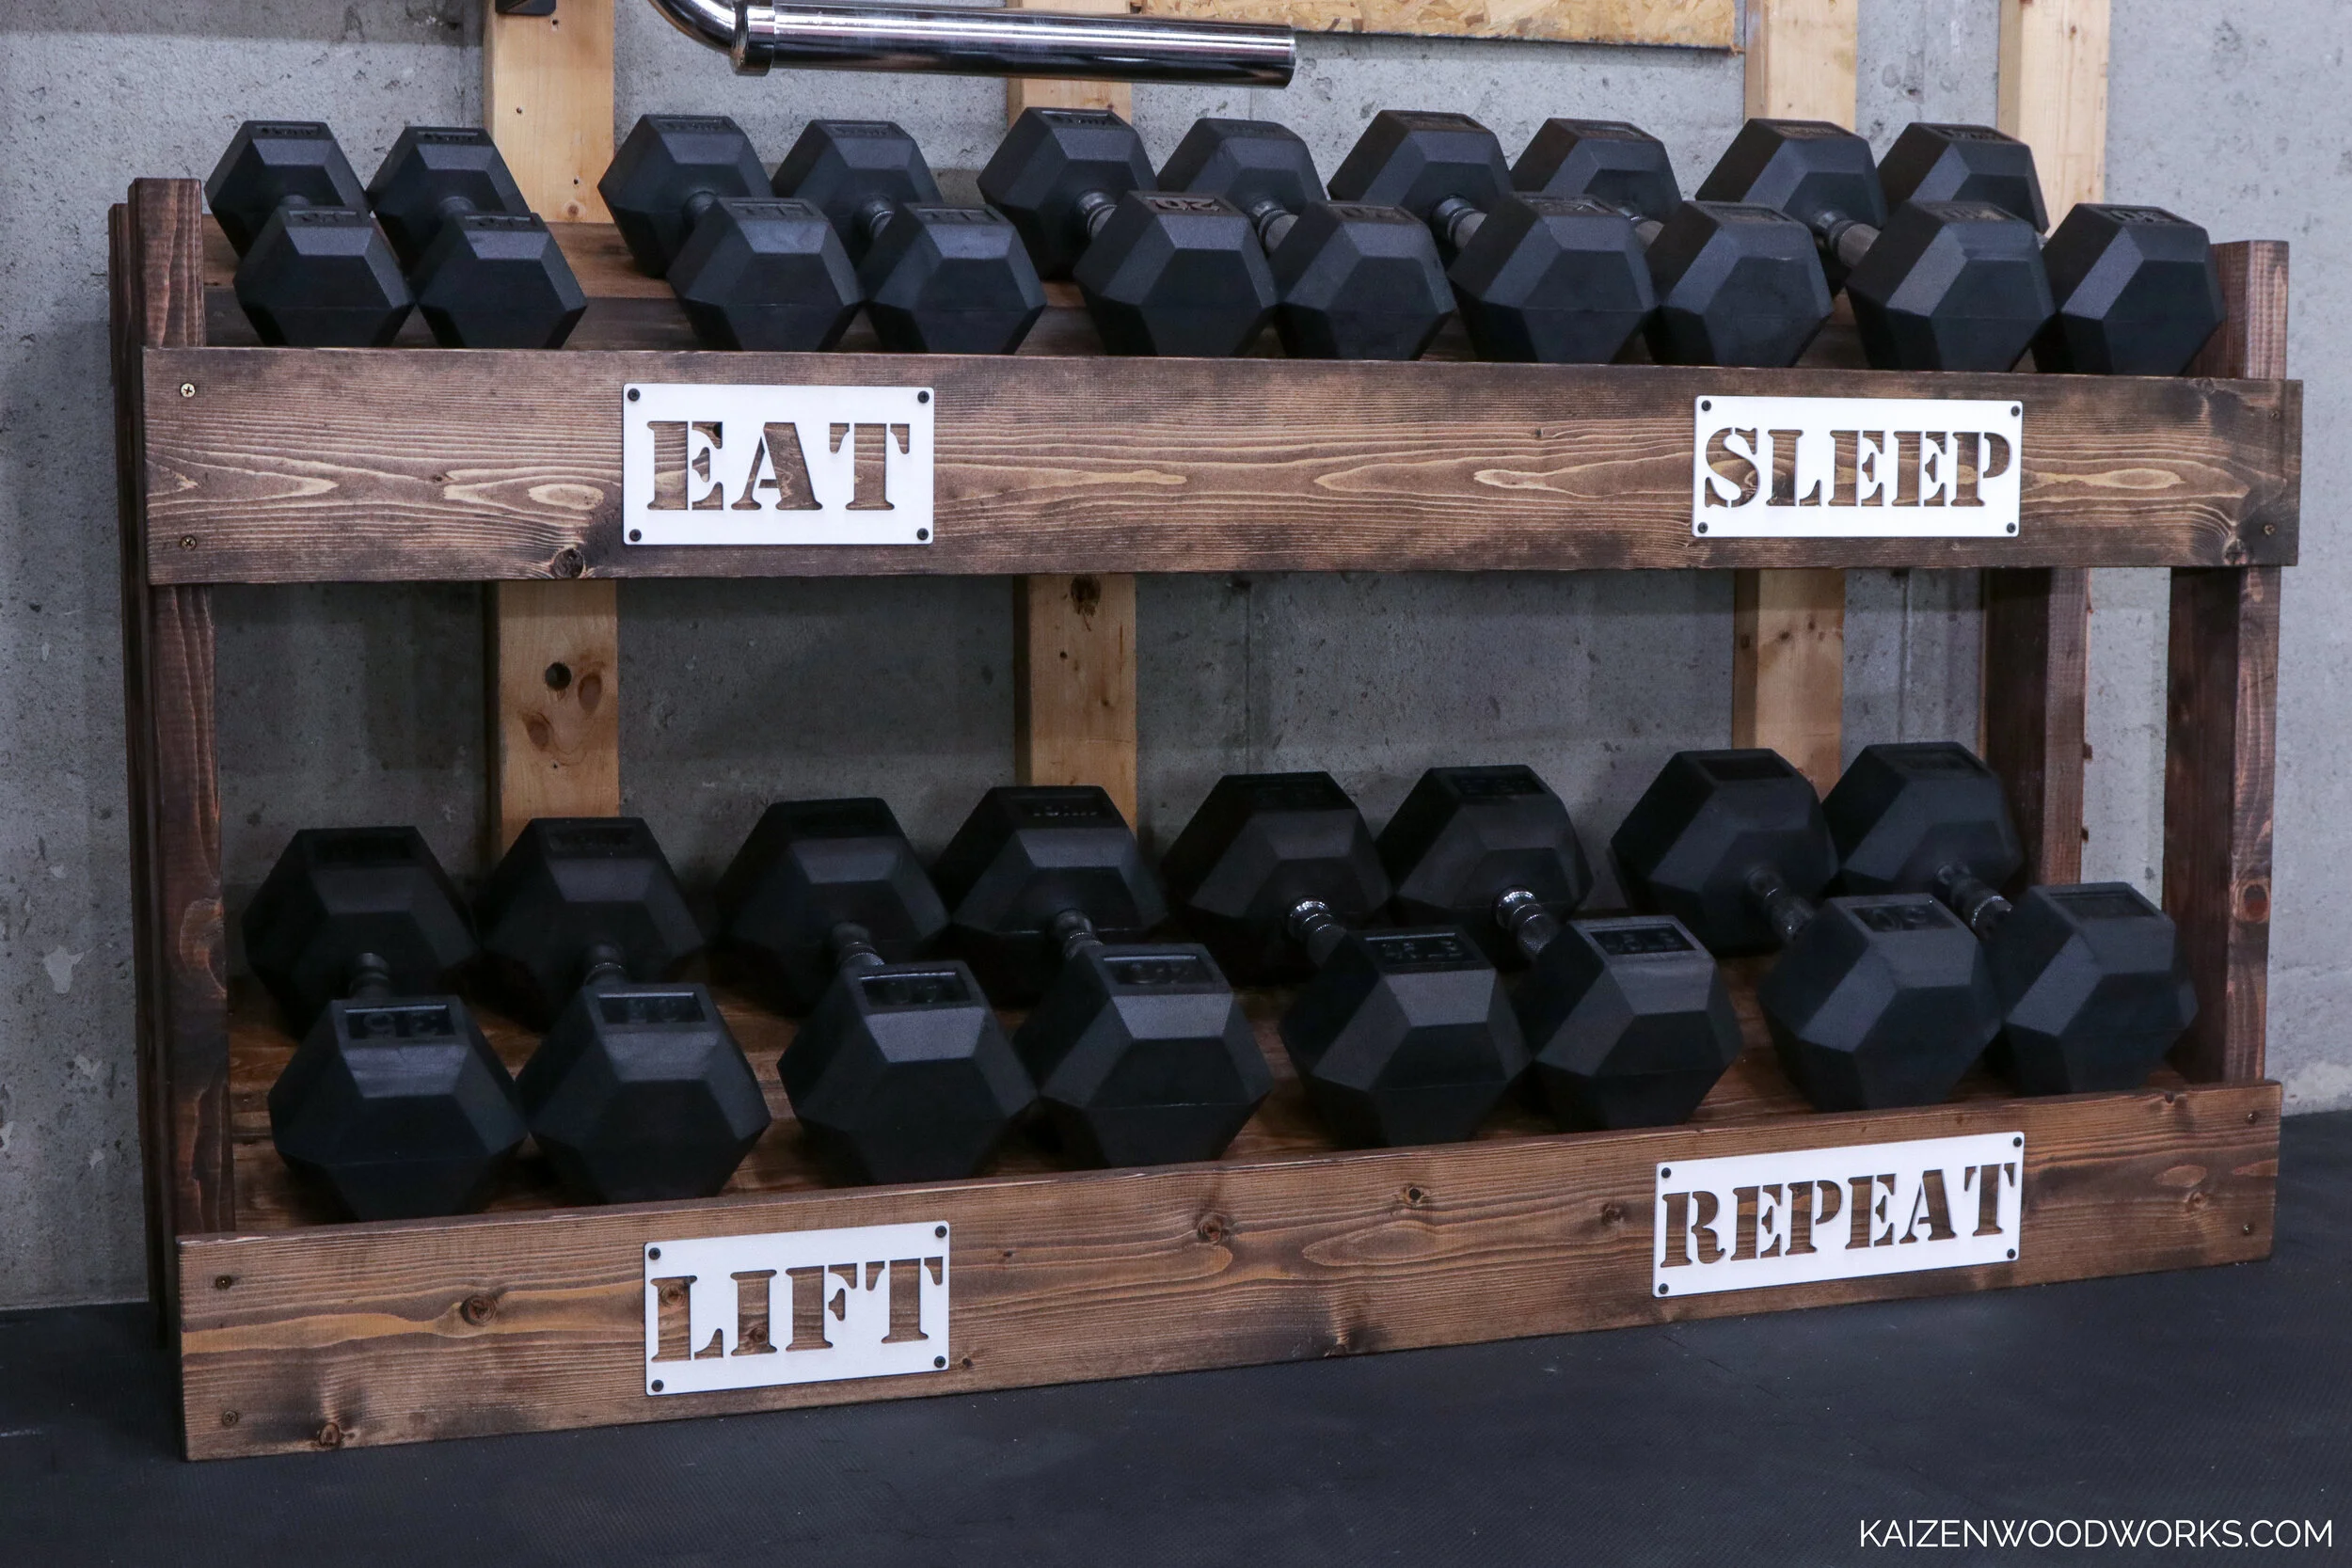
My 10-50 set fits perfectly.
Wrap-Up: Build Your Perfect Home Gym
Creating your own DIY dumbbell rack isn’t just a way to save money—it’s an opportunity to customize your home gym to fit your needs perfectly. With a little effort and creativity, you can build a rack that’s functional, durable, and uniquely yours.
Not into DIY? No problem! With so many great options from trusted brands like Rogue Fitness, Fringe Sport, and Bells of Steel, you’re sure to find a solution that works for you.
Whether you’re building or buying, investing in proper dumbbell storage is a game-changer for any home gym. Start your project today, and take one step closer to the gym setup of your dreams!